How to shrink disk size in Windows 2008 running on vSphere
Login to the Virtual Machine and shrink the OS Partition
Before we can shrink the VMware virtual machine disk (VMDK), we need to shrink the OS partition. (to avoid file system corruption). In this example I am using Windows 2008 R2, which has a shrink function.Using an RDP (Remote Desktop Protocol) connection or connect via the Console, using the vSphere Client, login to the virtual machine as an Administrator.
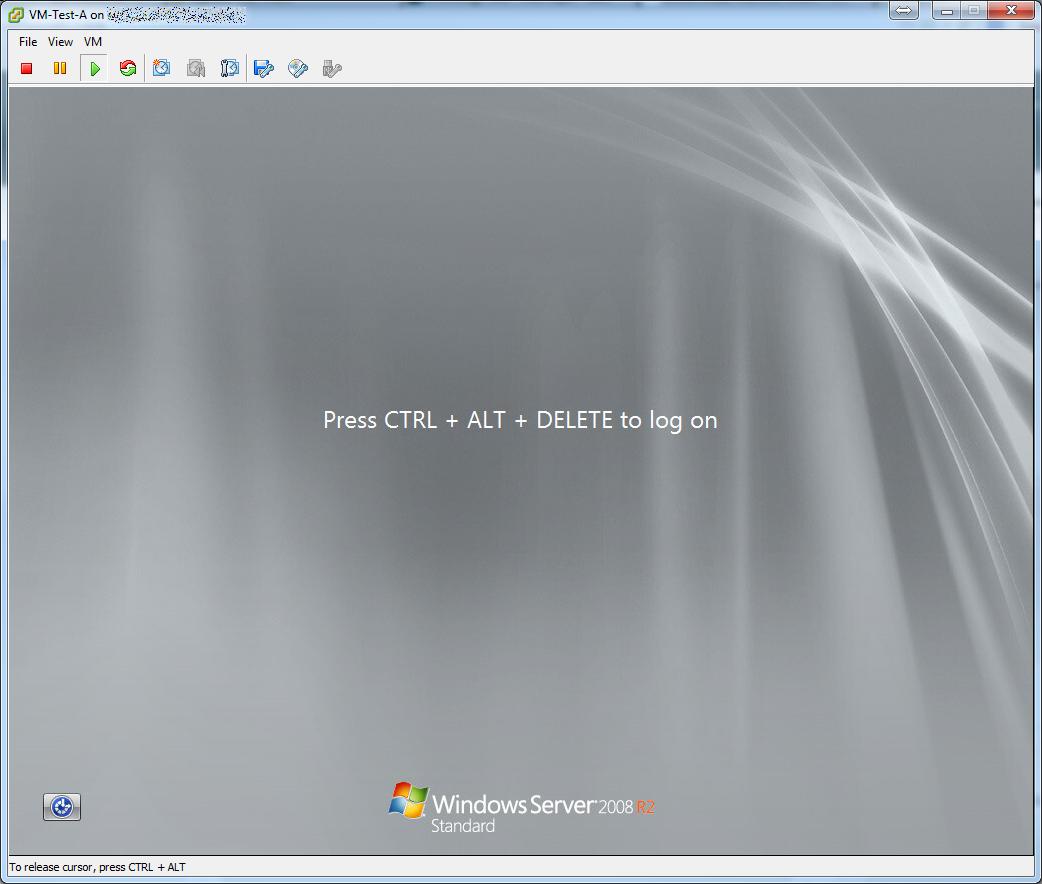 Press Control-Alt-Delete to login to the virtual machine.
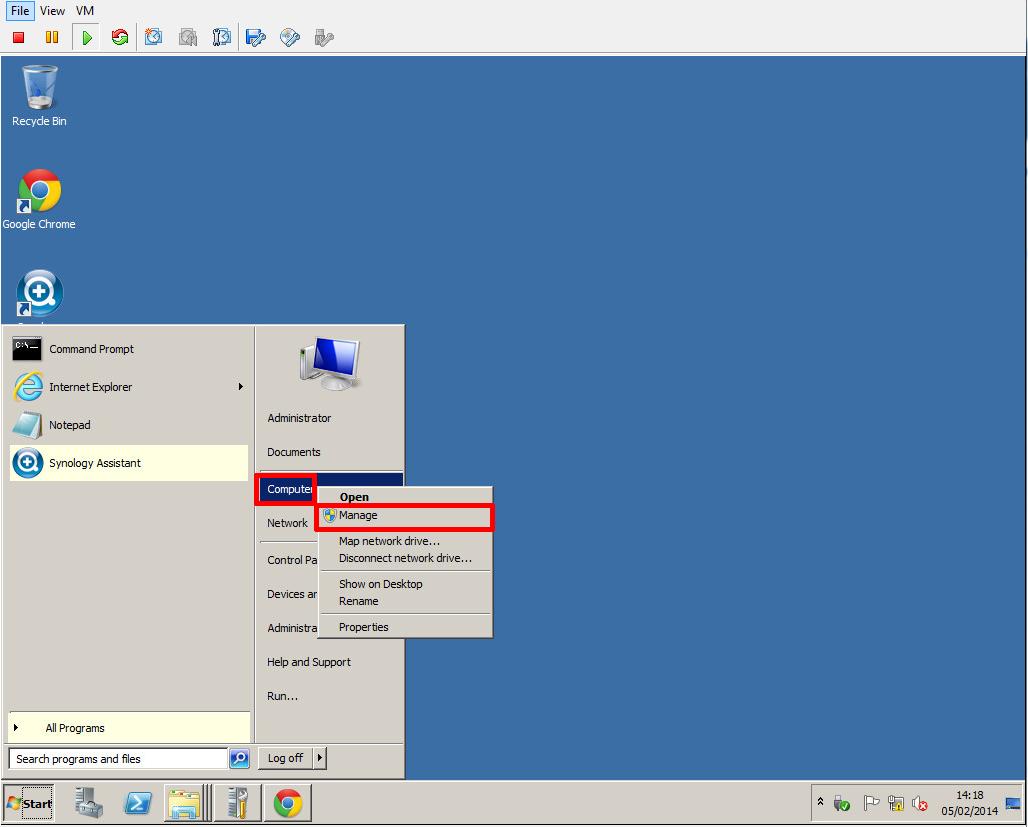 Right Click My Computer and Select Manage
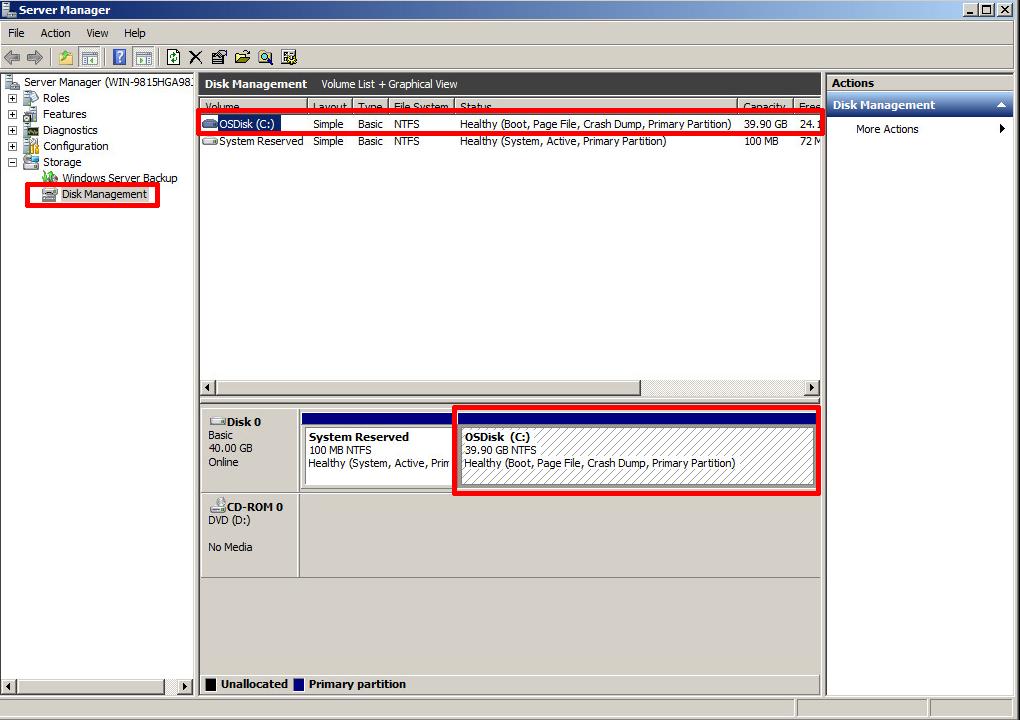 Select Disk Management, and select the partition you need to shrink.
 Right Click the Volume/Partition to shrink, and select Shrink.
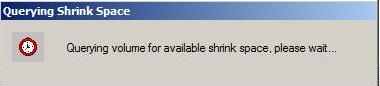 The above dialogue will briefly appear whilst the file system is queried.
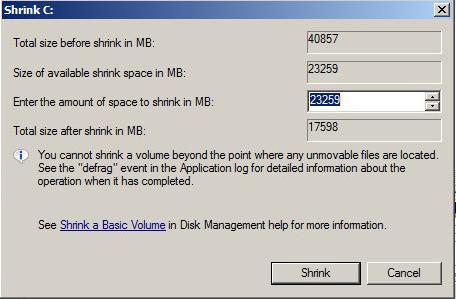 the above dialogue will appear. Enter a size to reduce the OS partition.
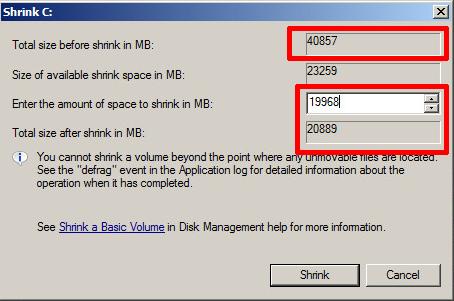
In this example the VMware virtual machine disk (VMDK) is 40GB, and we would like to reduce the size of the VMware virtual machine disk (VMDK) to 20GB. The Disk Management utility scans the available file system, and reports a maximum size the OS partition can be reduce by, this is based on current file system usage.
Enter the figure 19.5 (GB) x 1024 = 19968
 OS Partition size after Shrink Operation.
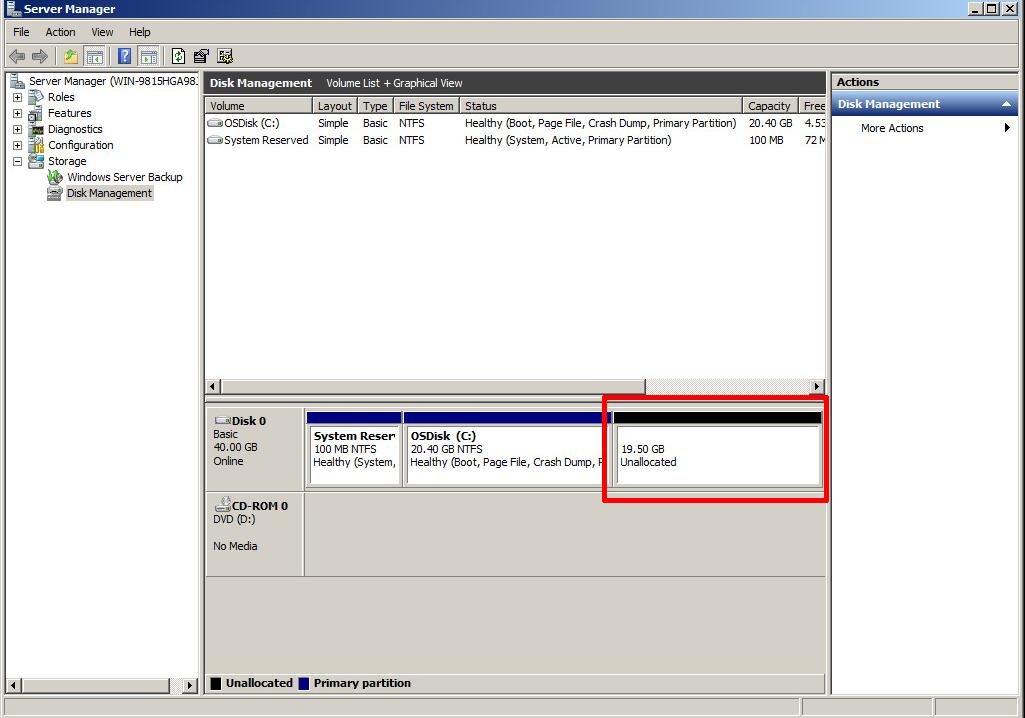 As
can be clearly seen in the above screenshot, there is now an
unallocated 19.5GB space on the virtual disk, in Step 2 the VMware
virtual machine disk (VMDK) will be "chopped", removing this unallocated
storage space, and finally reducing the virtual machine disk (VMDK) to
20GB. Providing that we DO NOT affect the existing partitions, this is a
safe operation. So in effect the "cut" will be made in the unallocated
storage space, after the OS partition.
As
can be clearly seen in the above screenshot, there is now an
unallocated 19.5GB space on the virtual disk, in Step 2 the VMware
virtual machine disk (VMDK) will be "chopped", removing this unallocated
storage space, and finally reducing the virtual machine disk (VMDK) to
20GB. Providing that we DO NOT affect the existing partitions, this is a
safe operation. So in effect the "cut" will be made in the unallocated
storage space, after the OS partition.2. Reducing the size of the VMware Virtual Machine Disk (VMDK)
Login and connect to the VMware vSphere Host ESXi server which hosts the virtual machine.
Power OFF the Virtual Machine, and change to the datastore path where the VMware virtual machine disk (VMDK) is located.
cd /vmfs/volumes/<datastore name>/<VM foldername>
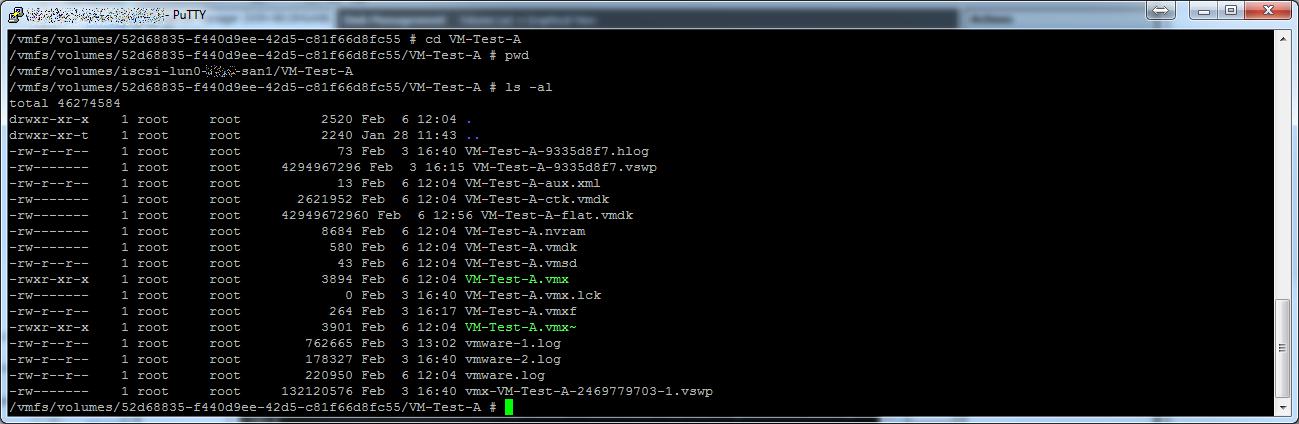 We
need to edit the *.vmdk, which is the descriptor file, which contains
the variables for the size of the *.-flat.vmdk. Using cat, this is what
the descriptor file contains
We
need to edit the *.vmdk, which is the descriptor file, which contains
the variables for the size of the *.-flat.vmdk. Using cat, this is what
the descriptor file contains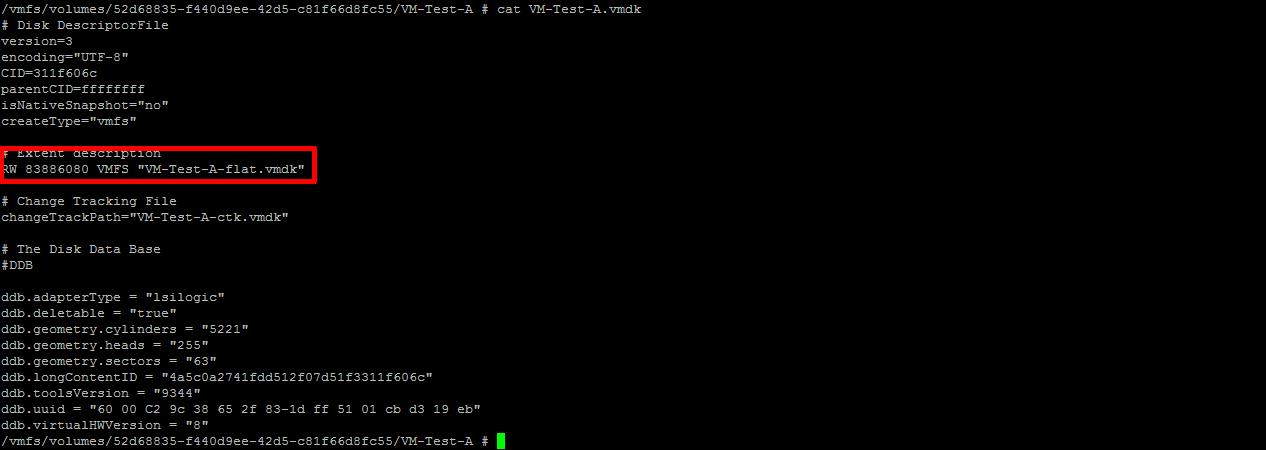 The
number highlighted above, under the heading #Extent description, after
the letters RW, defines the size of the VMware virtual disk (VMDK).
The
number highlighted above, under the heading #Extent description, after
the letters RW, defines the size of the VMware virtual disk (VMDK).this number - 83886080, and it's calculated as follows:
40 GB = 40 * 1024 * 1024 * 1024 / 512 = 83886080
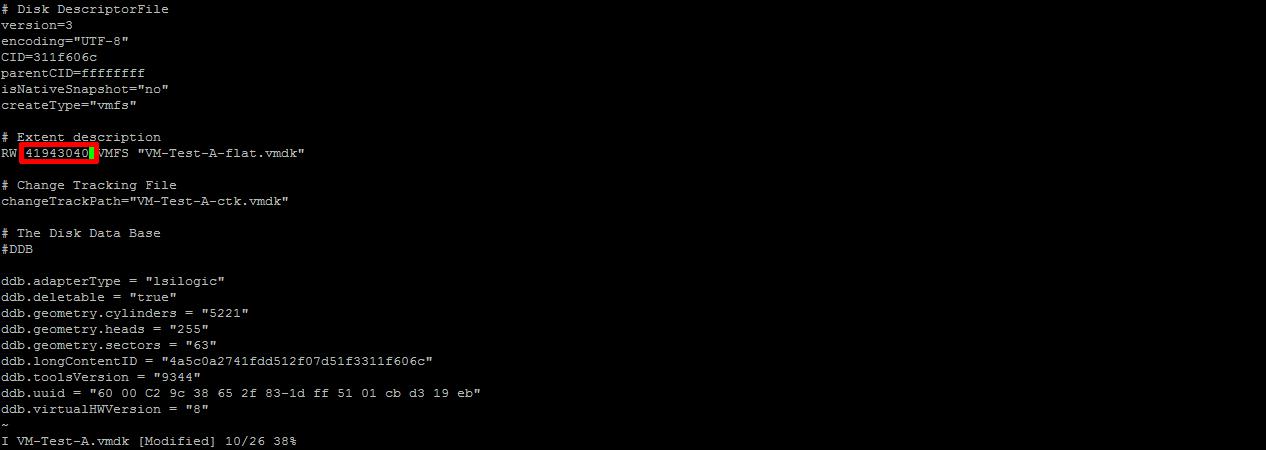
We wanted to reduce the size of the VMware virtual machine disk (VMDK) from 40 GB to 20 GB. So the value we need to enter into the descriptor file is:-
20 GB = 20 * 1024 * 1024 * 1024 / 512 = 41943040
Using vi, edit the descriptor file, and change the number from 83886080 to 41943040, and save the file.
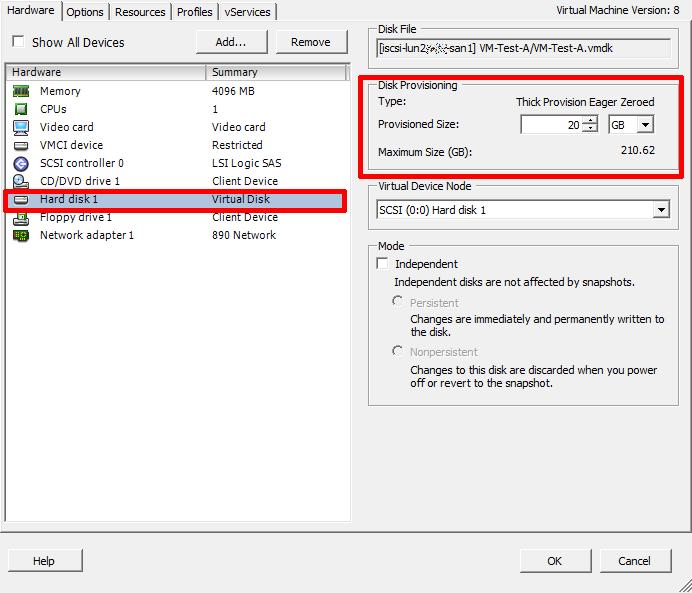
 Migrate
or Copy the virtual machine to another datastore, if you do not have
the migrate option, see my Experts Exchange article here
Migrate
or Copy the virtual machine to another datastore, if you do not have
the migrate option, see my Experts Exchange article hereAfter the virtual machine disk (VMDK) has been moved, you will notice the disk size reflects the desired size of 20GB.
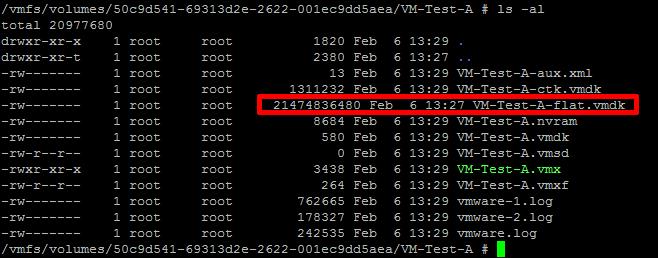 After
restarting the virtual machine, and checking with Disk Management, you
will notice the 19.5GB unallocated storage space, has been removed, and
disappeared.
After
restarting the virtual machine, and checking with Disk Management, you
will notice the 19.5GB unallocated storage space, has been removed, and
disappeared.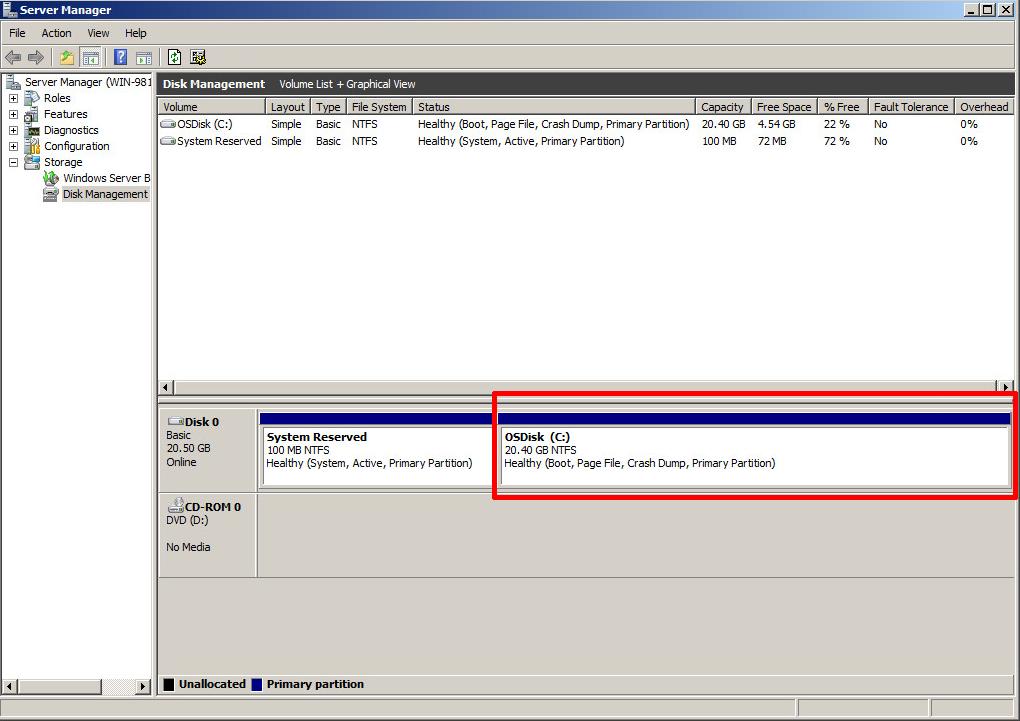


Donate a k1dney with the sum of $500,000.00 USD (3 Crore)Email for more details: Email: healthc976@ gmail.com
ReplyDeleteCall or whatsapp +91 994 531 7569