Installation of vRealization automation 7
This is our first stop in our journey to install vRealize Automation 7
and all of it’s new features. This post starts with the setup of the
environment and assumes that you’ve deployed a vRealize Automation
appliance from an OVA and that you’ve also got a Windows Server deployed
so that we can install the IAAS components on it.
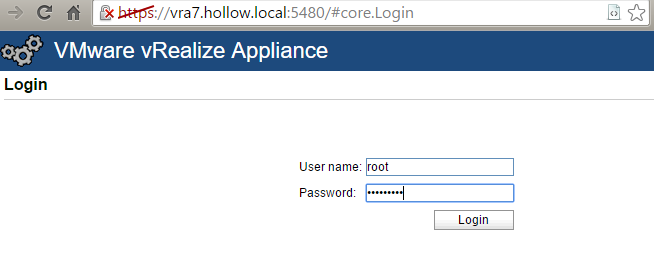
After you’ve deployed the vRA7 OVA, login to the appliance with the root login and password supplied during your OVA deployment.
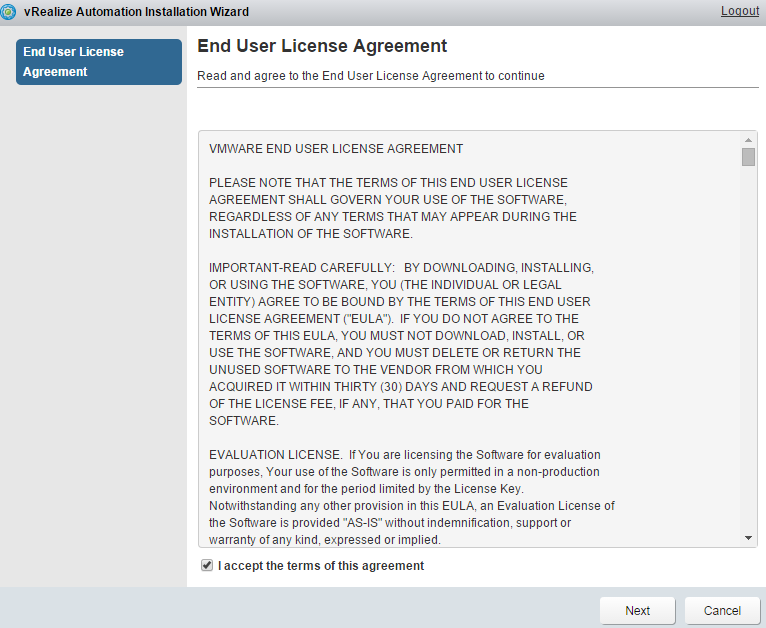
Unlink past versions of vRA, we now have a lovely wizard that pops up and of course asks us to acknowledge that we will adhere to the End User License Agreement. Click the check mark (after reading all of the EULA of course) and click next.
Look at this! We get a deployment wizard and it even asks us what kind of deployment we’re going for. A minimal deployment is what we’re doing in this post, but a fully distributed, highly available, “Enterprise deployment” is now an option as well. I’M REALLY EXCITED ABOUT THIS IF YOU CAN’T TELL. For this post click the minimal deployment option and select the check box next to “Install Infrastructure as a Service” option.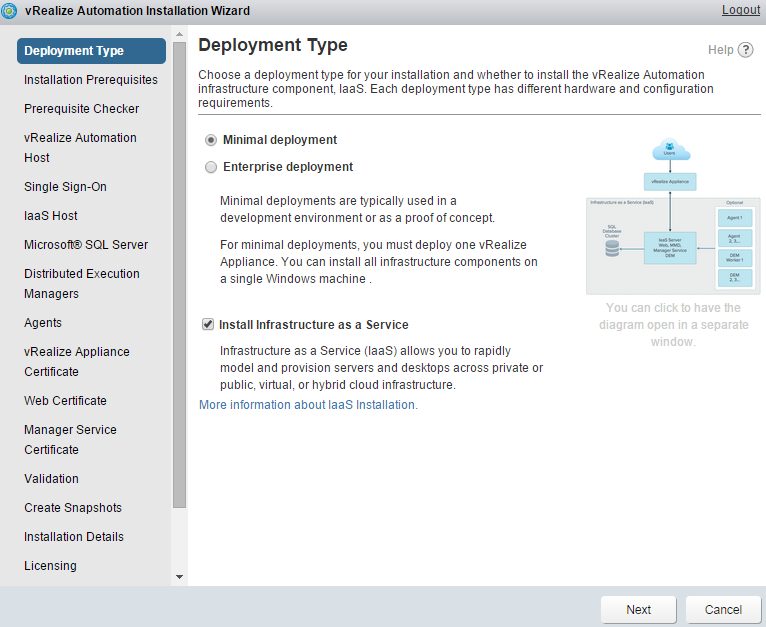
Since we selected the IaaS option in the last screen, we’ll see there are some things we need to do on our IaaS servers. This is the Windows server we’ve stood up in addition to the vRA virtual appliance. You’ll notice there is a link on this page will will let you download an MSI file.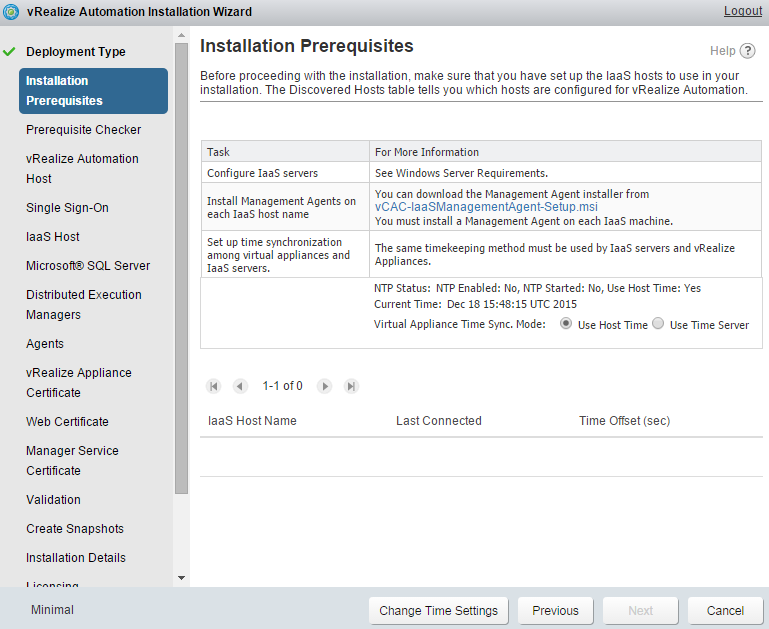
Run this installer on your Windows server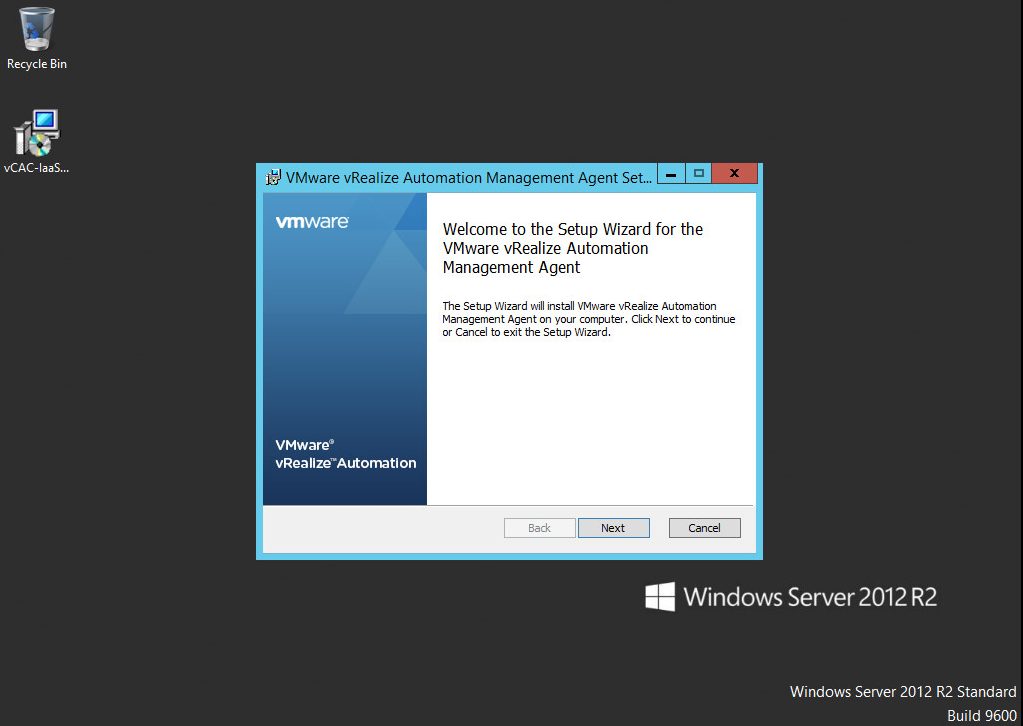
This installer will ask for the address and login information for your vRA appliance. Click the “Load” button to grab the SSL fingerprint and confirm the connection. Click Next.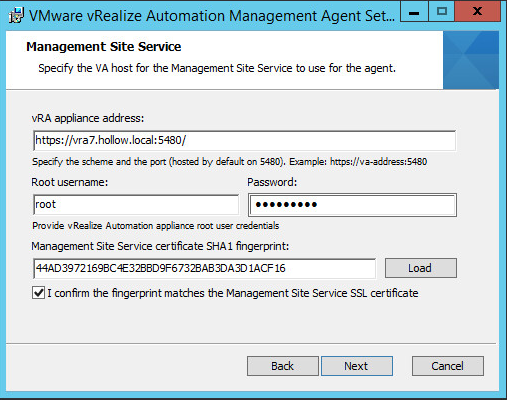
The next screen will ask you for account information that has administrative rights on your IaaS Server. This account will be used to install services and additional pre-requisite software.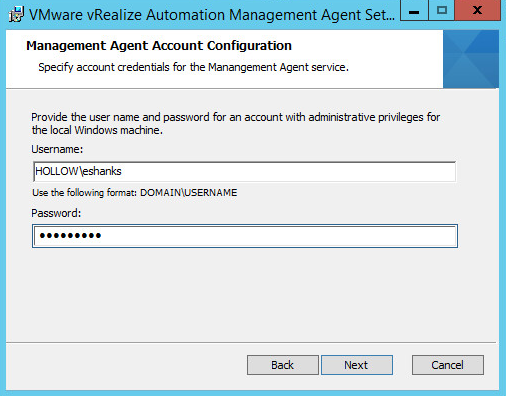
Once the installer finishes, go back to your wizard. Notice that at the bottom of the screen you were on, there is now an IaaS Server listed. Set your NTP settings (THIS IS VERY IMPORTANT !) and click next.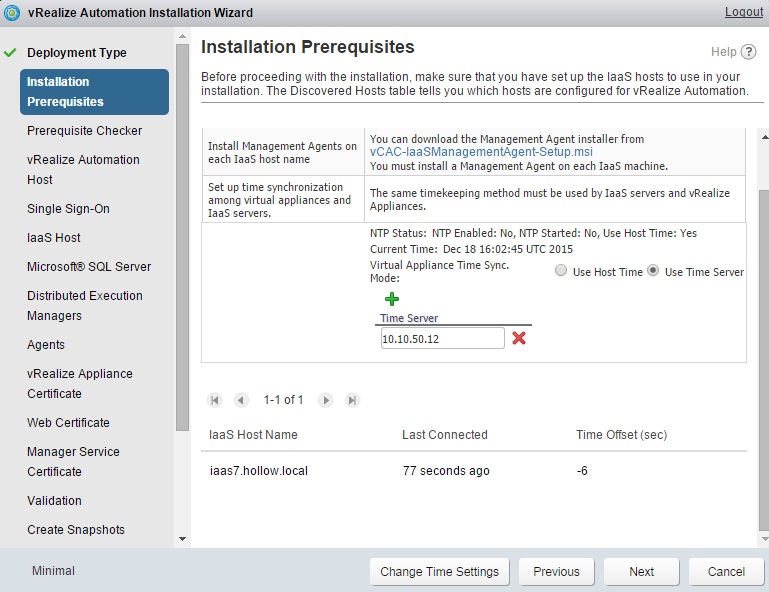
Now we we are met with a prerequisite check screen. Click “Run” to test to make sure you have all the prerequisites met. This step checks to see if you have things like IIS installed on the IaaS Server, and the appropriate .NET packages etc.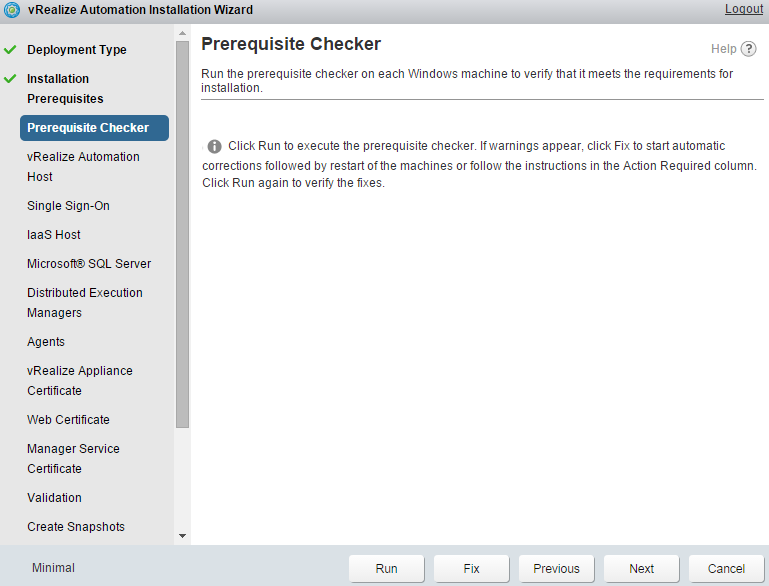
I’m pretty sure that your prerequisite check will fail, but thats ok. Once the check is complete you can view the details and click the “fix” button to have the installer automatically take care of them for you.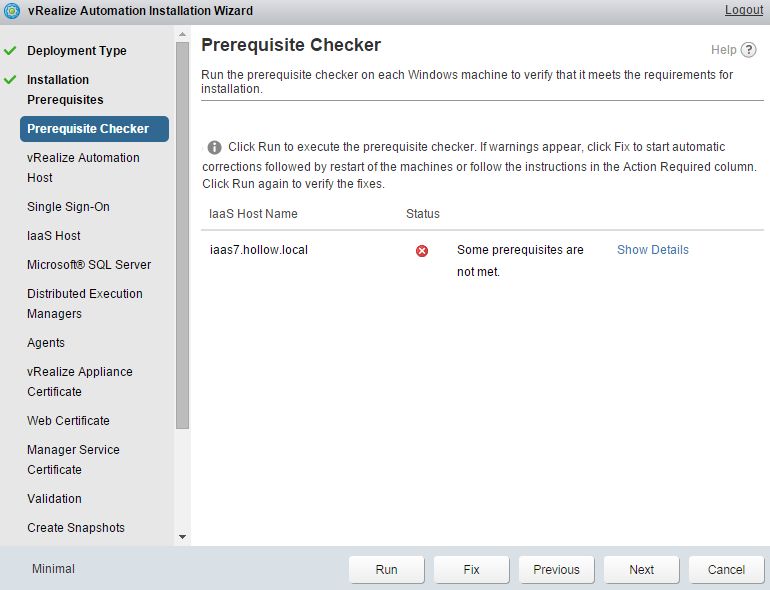
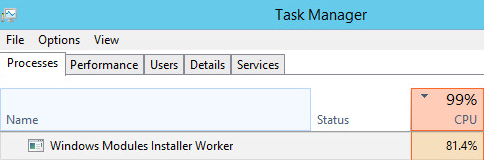
The fix step could take some time. If you aren’t sure that anything is really happening or not, go over to your IaaS Server and check task manager. You’ll probably find a “Windows Modules Installer Worker” running and taking up copious amounts of CPU.
You’ll also see some progress status happening in the install wizard.
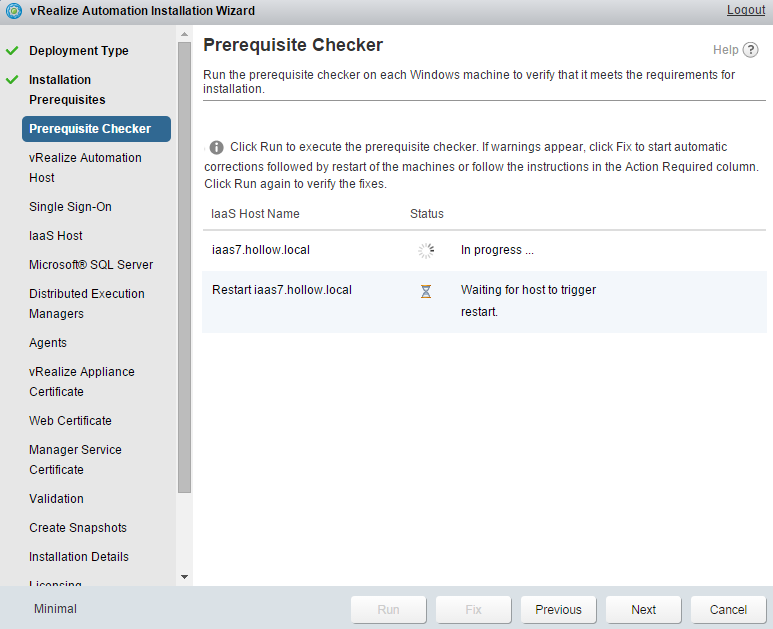
Once the prerequisites have been installed and the server is rebooted (the reboot happens automatically too) click Next.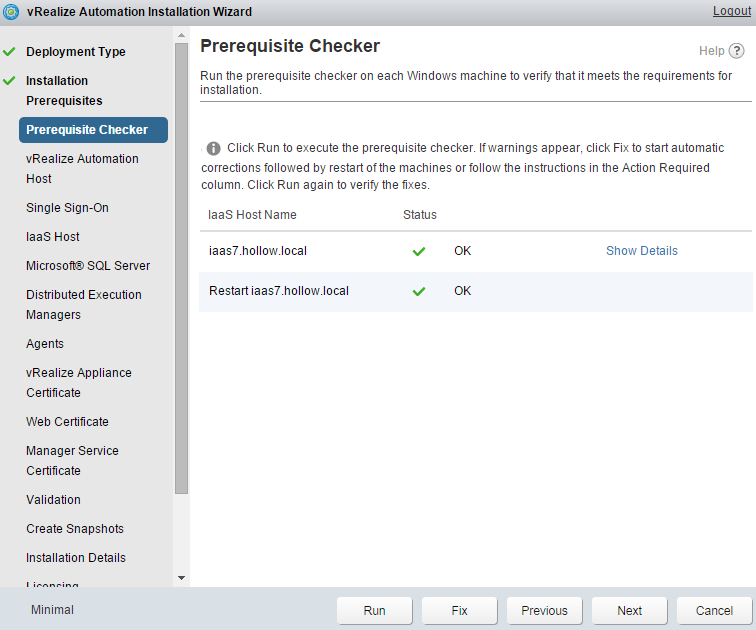
Next we’re asked for the vRA host name. You could change the name here but I’ve chosen to grab my hostname from DNS since I already added my vRA appliance to my DNS zone.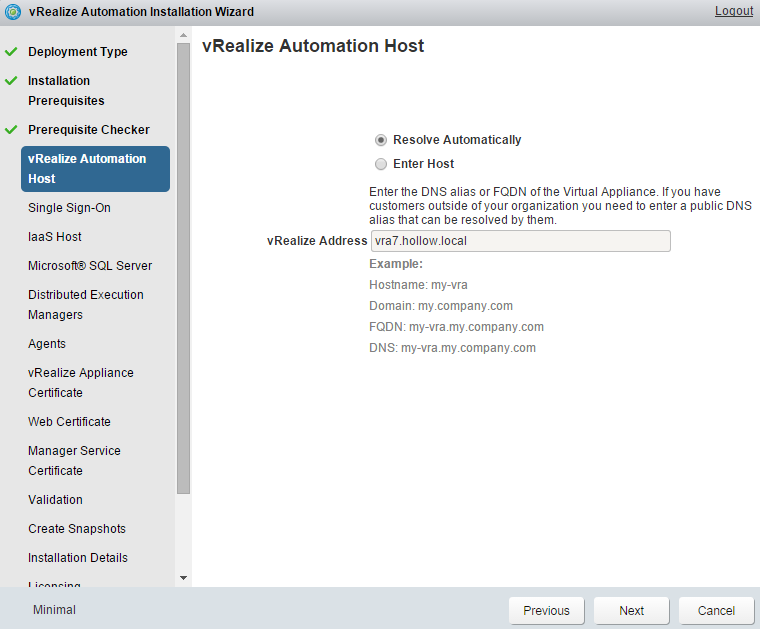
Enter a very strong password for your default tenant administrator account. Be sure to keep track of this since you’ll need this down the road. Click Next.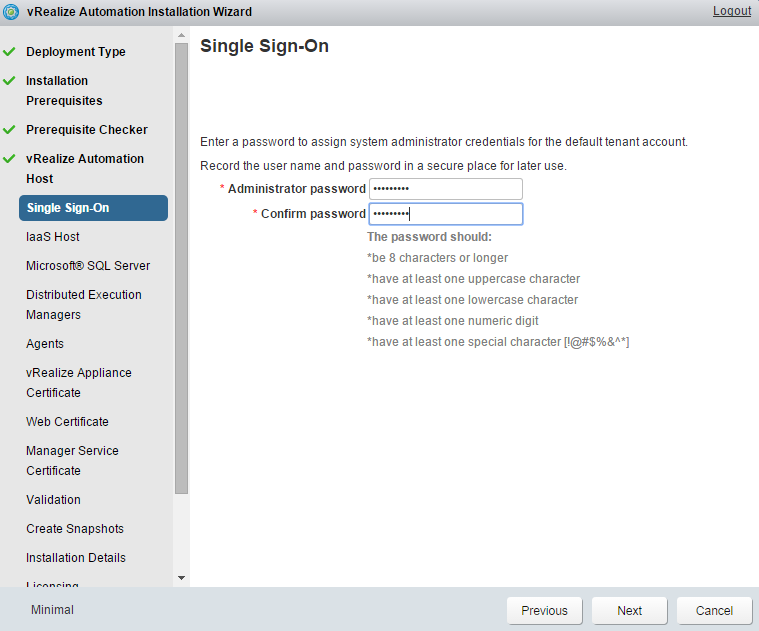
Now we enter the IaaS Web server address. Since we’re not using a load balancer, we’ll just input the name of our Windows IaaS Host here. Select the IaaS host from the dropdown in order to install components on it and enter a login that has administrative credentials on the box. Also, enter a security passphrase for the SQL database to use for encryption. Click Next.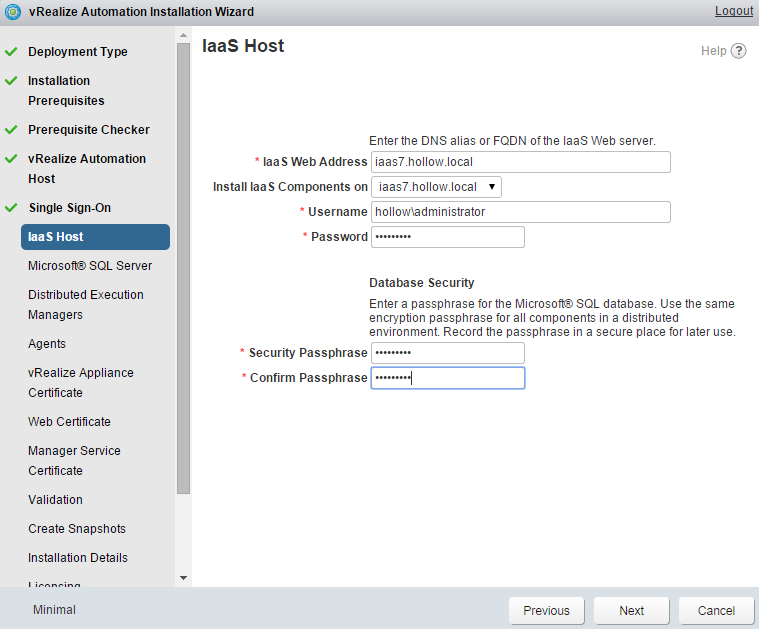
Next enter the name of your SQL server and a name for the new database that will be created.
Select the name of an IaaS Host in which to install the DEM Workers. This should be simple since it’s there’s only one IaaS box in the simple environment of ours. Add login credentials to install the DEM service. Click Next.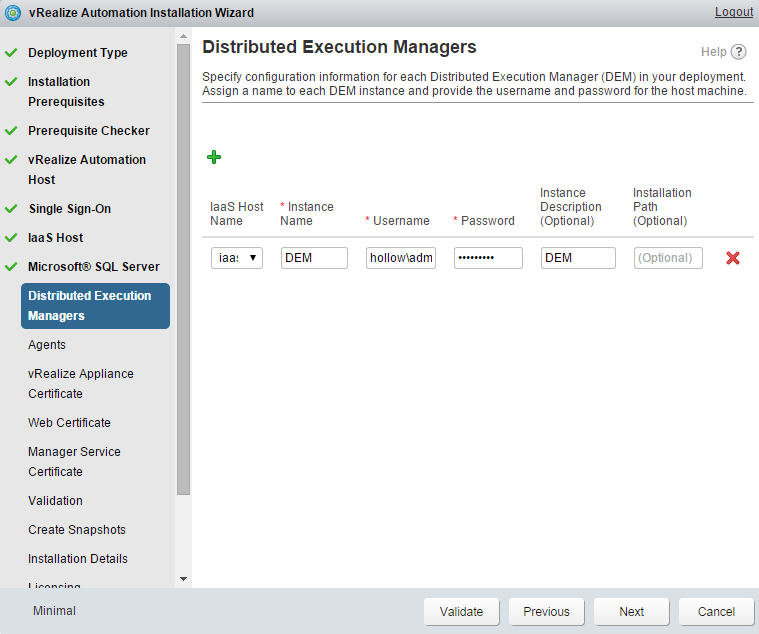
We’ll perform the same operation with our DEM Agents except we need to specify an Endpoint here as well. I’ve named my Endpoint vCenter. The agent type is vSphere and I’ve provided login information. Click Next.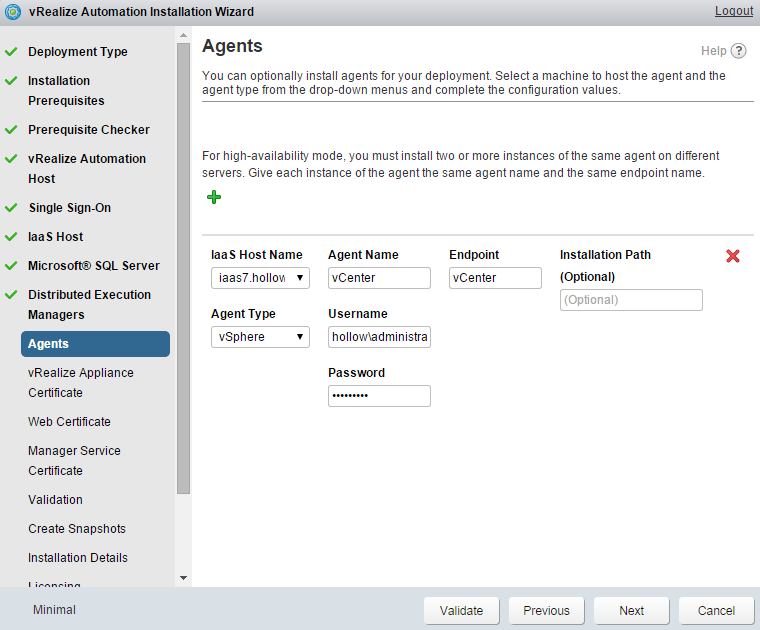
Now we can import certificates that we created with our own certificate authority or we can generate self signed certs. The first cert we need to generate is the vRA appliance and web portal. Enter the certificate information and click Next.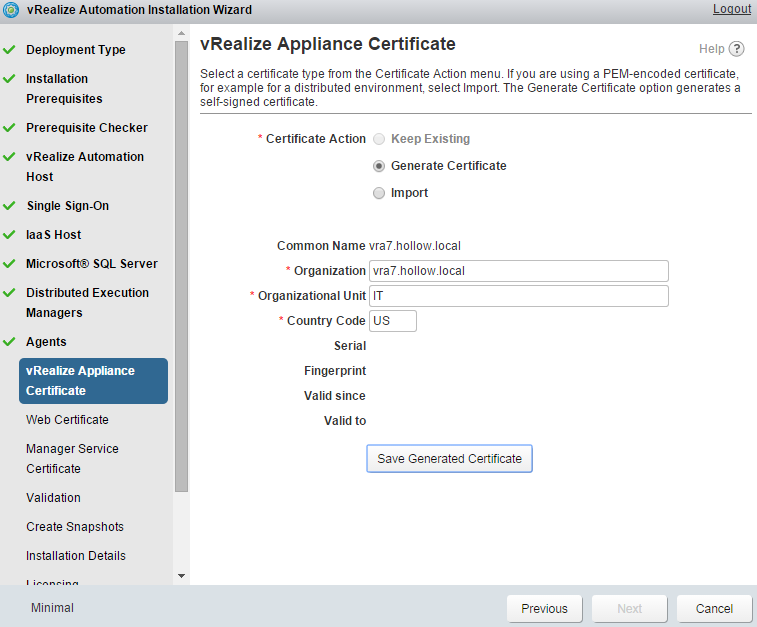
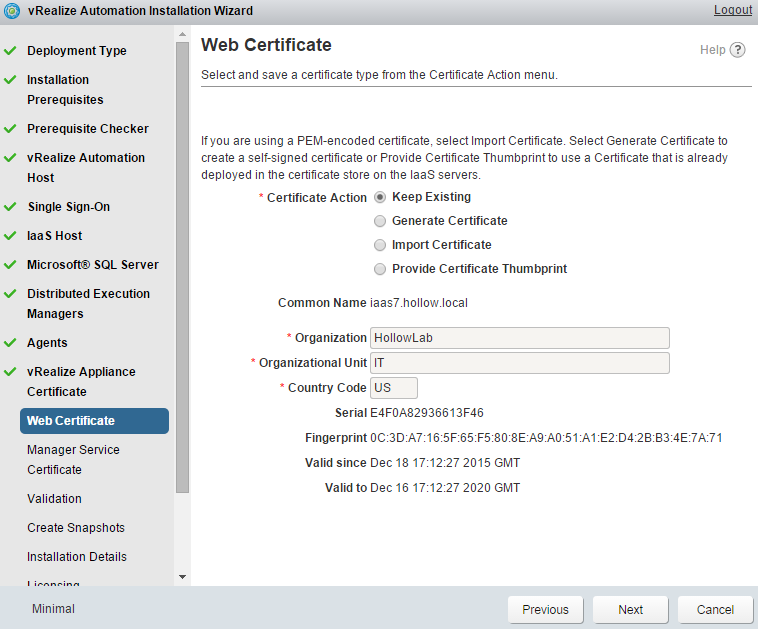
Now we need to enter the web certificate information for the IaaS Server. Enter the certificate information and click Next.
The last certificate we need to provide is the manager service certificate. Enter the certificate information and click Next.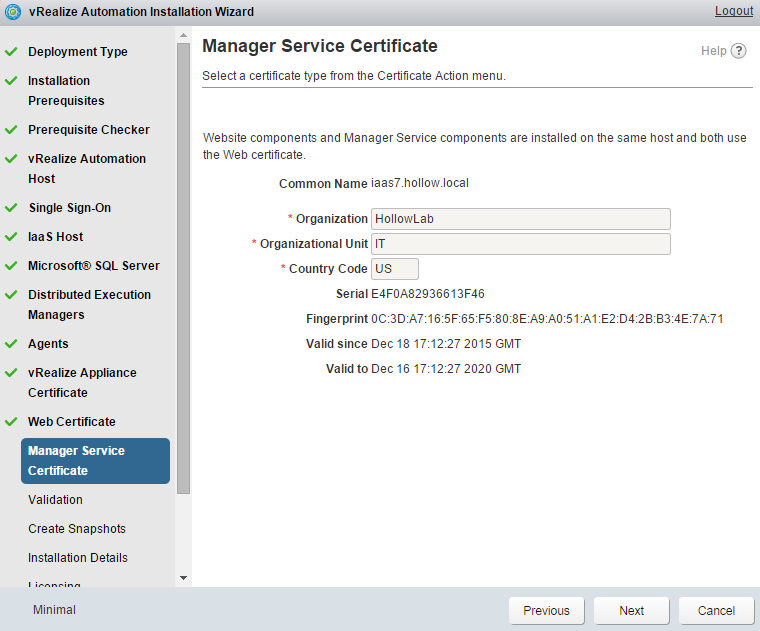
Now we’re ready to validate all of our settings. Lucky for us, the wizard will do that before installing anything. Click Validate and grab a cup of coffee. This will take a bit.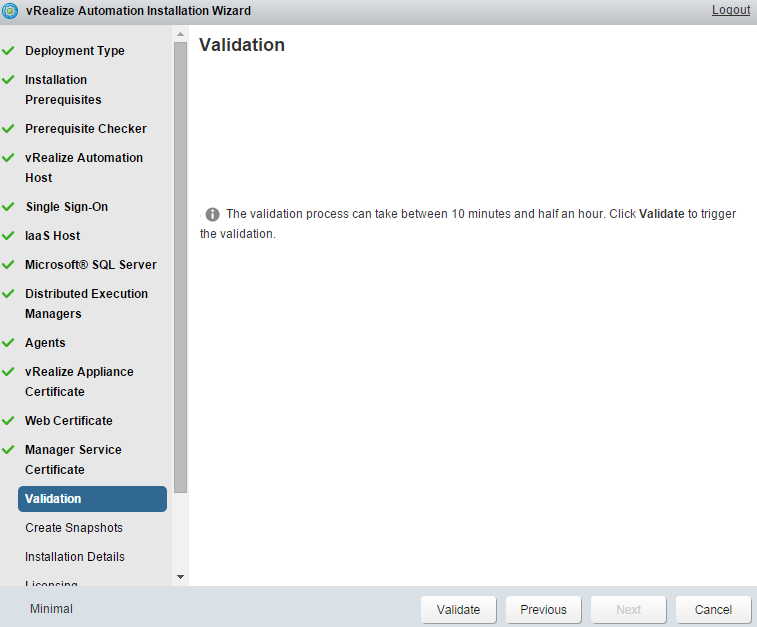
Once the validation has completed successfully, Click Next.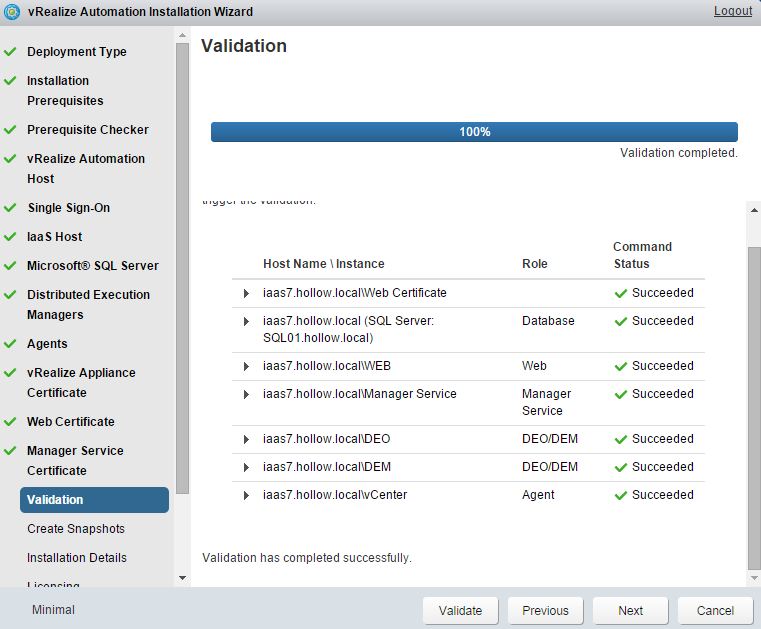
A nice reminder will be presented to you here to take a couple of snapshots before continuing. This sounds like a pretty good plan to me. Go take your snapshots and then click Next.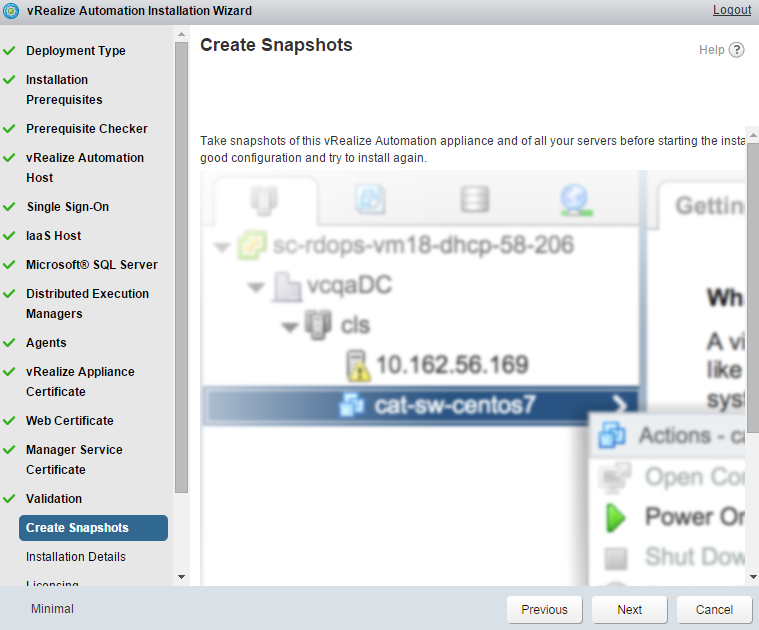
You’re ready to go. Click Install.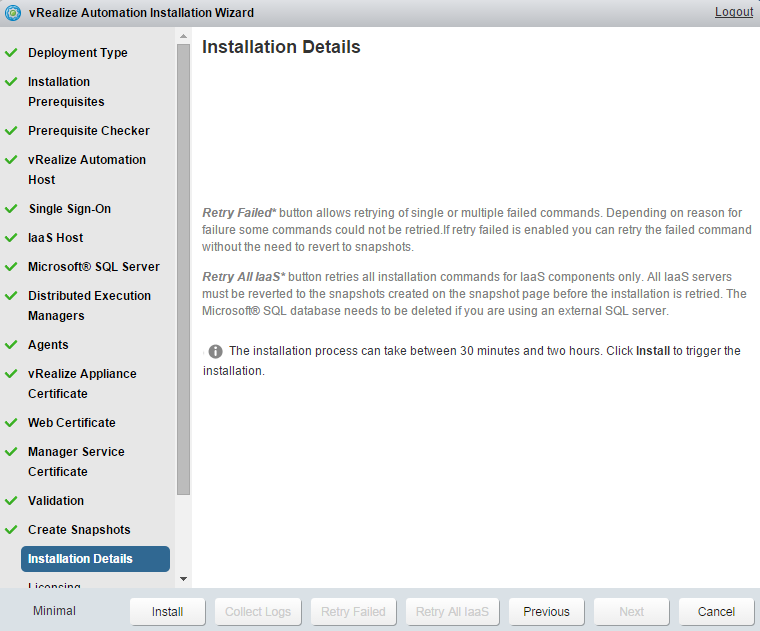
Hopefully, the install process will go flawlessly, and at the end you’ll have a nice screen with a bunch of green check marks. Click Next.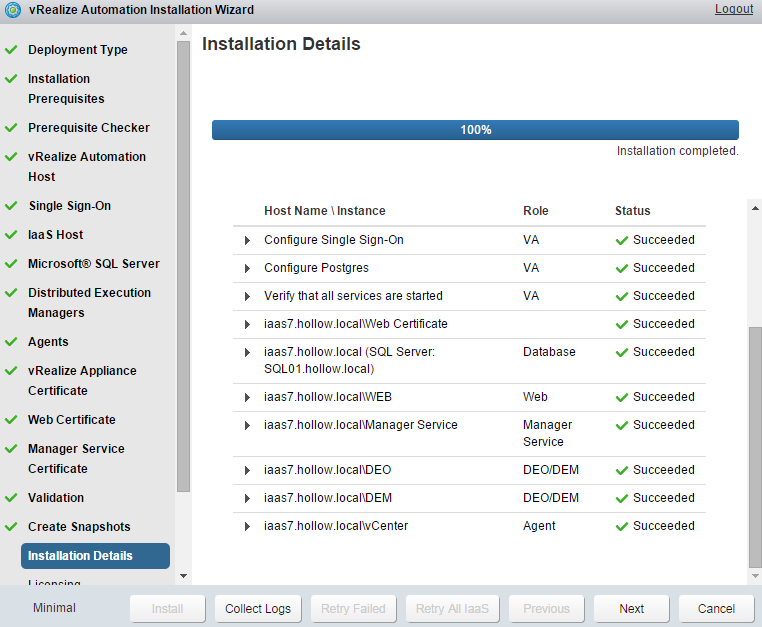
AHHHHHHH! The license. Nothing is free is it. Go grab your license key and enter it in the box. Click “Submit Key”. Then click “Next”.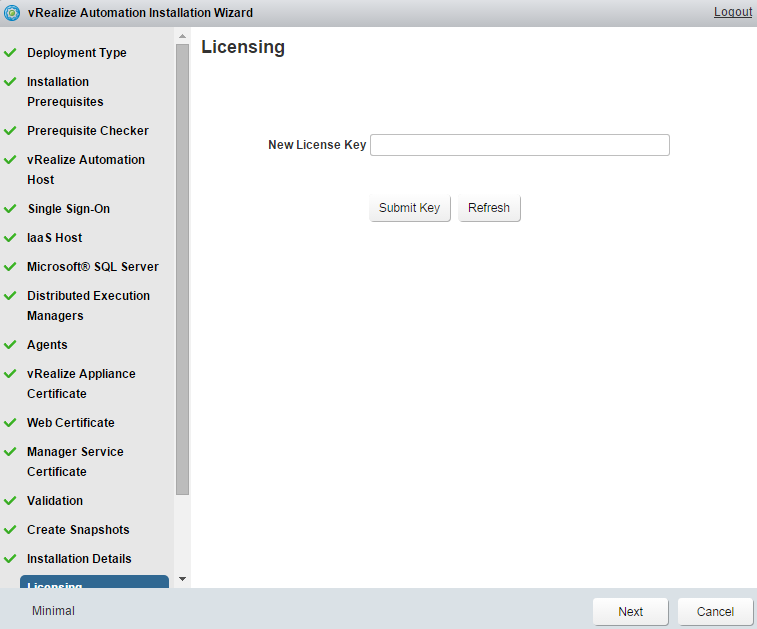
It’s up to you here. If you want to submit telemetry data back to VMware so they can better the product, go for it. If you’re really concerned about your privacy don’t check the box. It’s your call.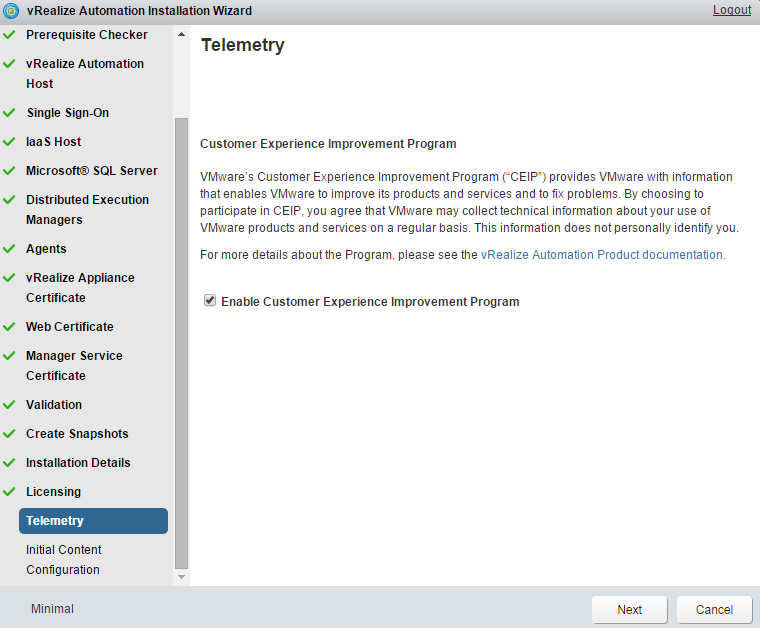
Some content can be created for you if you’d like. If you want this to happen, give the configurationadmin a login password and click “Create Initial Content”. Click “Next”.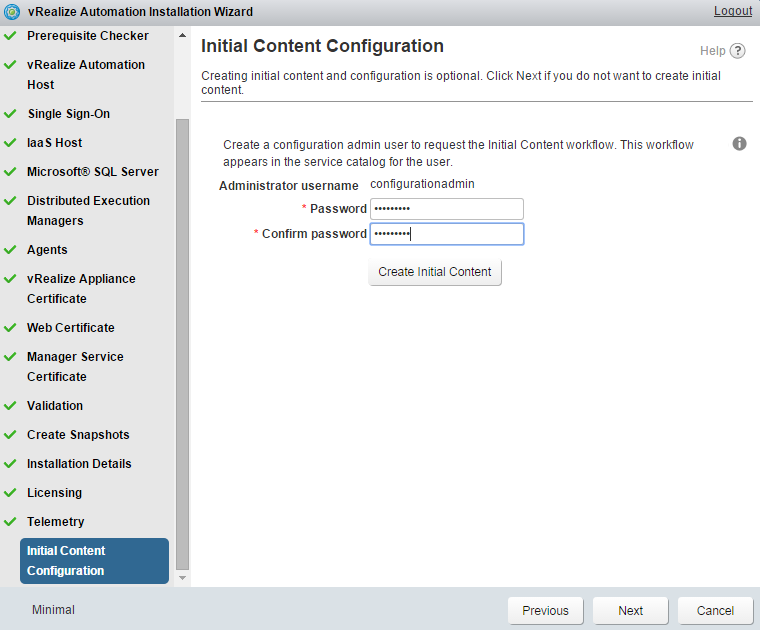
TA DA! vRealize Automation is now installed. Now the real fun begins. Click “Finish”.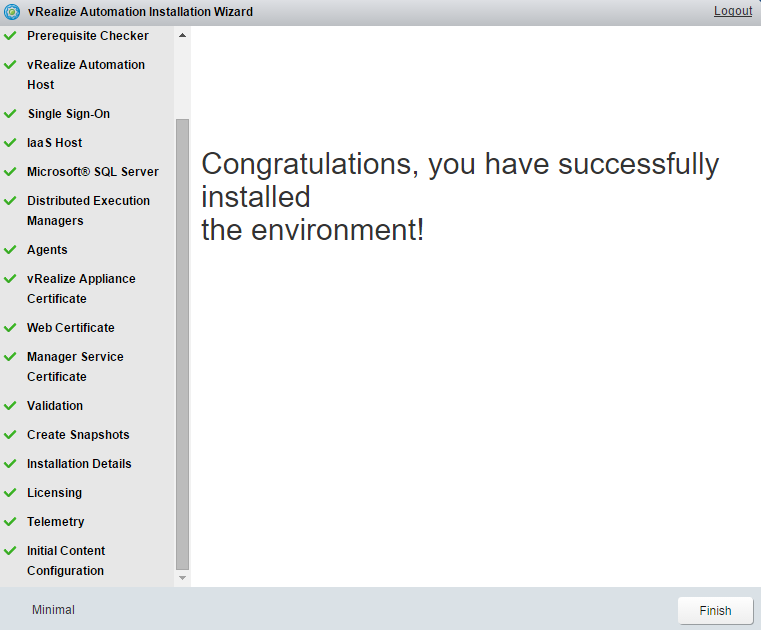
After you’ve deployed the vRA7 OVA, login to the appliance with the root login and password supplied during your OVA deployment.
Unlink past versions of vRA, we now have a lovely wizard that pops up and of course asks us to acknowledge that we will adhere to the End User License Agreement. Click the check mark (after reading all of the EULA of course) and click next.
Look at this! We get a deployment wizard and it even asks us what kind of deployment we’re going for. A minimal deployment is what we’re doing in this post, but a fully distributed, highly available, “Enterprise deployment” is now an option as well. I’M REALLY EXCITED ABOUT THIS IF YOU CAN’T TELL. For this post click the minimal deployment option and select the check box next to “Install Infrastructure as a Service” option.
Since we selected the IaaS option in the last screen, we’ll see there are some things we need to do on our IaaS servers. This is the Windows server we’ve stood up in addition to the vRA virtual appliance. You’ll notice there is a link on this page will will let you download an MSI file.
Run this installer on your Windows server
This installer will ask for the address and login information for your vRA appliance. Click the “Load” button to grab the SSL fingerprint and confirm the connection. Click Next.
The next screen will ask you for account information that has administrative rights on your IaaS Server. This account will be used to install services and additional pre-requisite software.
Once the installer finishes, go back to your wizard. Notice that at the bottom of the screen you were on, there is now an IaaS Server listed. Set your NTP settings (THIS IS VERY IMPORTANT !) and click next.
Now we we are met with a prerequisite check screen. Click “Run” to test to make sure you have all the prerequisites met. This step checks to see if you have things like IIS installed on the IaaS Server, and the appropriate .NET packages etc.
I’m pretty sure that your prerequisite check will fail, but thats ok. Once the check is complete you can view the details and click the “fix” button to have the installer automatically take care of them for you.
The fix step could take some time. If you aren’t sure that anything is really happening or not, go over to your IaaS Server and check task manager. You’ll probably find a “Windows Modules Installer Worker” running and taking up copious amounts of CPU.
You’ll also see some progress status happening in the install wizard.
Once the prerequisites have been installed and the server is rebooted (the reboot happens automatically too) click Next.
Next we’re asked for the vRA host name. You could change the name here but I’ve chosen to grab my hostname from DNS since I already added my vRA appliance to my DNS zone.
Enter a very strong password for your default tenant administrator account. Be sure to keep track of this since you’ll need this down the road. Click Next.
Now we enter the IaaS Web server address. Since we’re not using a load balancer, we’ll just input the name of our Windows IaaS Host here. Select the IaaS host from the dropdown in order to install components on it and enter a login that has administrative credentials on the box. Also, enter a security passphrase for the SQL database to use for encryption. Click Next.
Next enter the name of your SQL server and a name for the new database that will be created.
Select the name of an IaaS Host in which to install the DEM Workers. This should be simple since it’s there’s only one IaaS box in the simple environment of ours. Add login credentials to install the DEM service. Click Next.
We’ll perform the same operation with our DEM Agents except we need to specify an Endpoint here as well. I’ve named my Endpoint vCenter. The agent type is vSphere and I’ve provided login information. Click Next.
Now we can import certificates that we created with our own certificate authority or we can generate self signed certs. The first cert we need to generate is the vRA appliance and web portal. Enter the certificate information and click Next.
Now we need to enter the web certificate information for the IaaS Server. Enter the certificate information and click Next.
The last certificate we need to provide is the manager service certificate. Enter the certificate information and click Next.
Now we’re ready to validate all of our settings. Lucky for us, the wizard will do that before installing anything. Click Validate and grab a cup of coffee. This will take a bit.
Once the validation has completed successfully, Click Next.
A nice reminder will be presented to you here to take a couple of snapshots before continuing. This sounds like a pretty good plan to me. Go take your snapshots and then click Next.
You’re ready to go. Click Install.
Hopefully, the install process will go flawlessly, and at the end you’ll have a nice screen with a bunch of green check marks. Click Next.
AHHHHHHH! The license. Nothing is free is it. Go grab your license key and enter it in the box. Click “Submit Key”. Then click “Next”.
It’s up to you here. If you want to submit telemetry data back to VMware so they can better the product, go for it. If you’re really concerned about your privacy don’t check the box. It’s your call.
Some content can be created for you if you’d like. If you want this to happen, give the configurationadmin a login password and click “Create Initial Content”. Click “Next”.
TA DA! vRealize Automation is now installed. Now the real fun begins. Click “Finish”.


Comments
Post a Comment