vRealize Automation 7 – Create Tenants
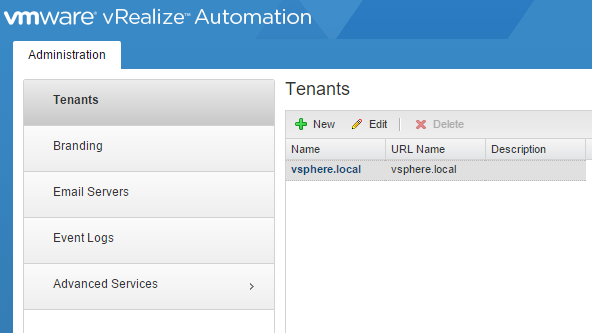
Now it’s time to create a new tenant in our vRealize Automation
portal. Let’s login to the portal as the system administrator account as
we have before. Click the Tenants tab and then click the “New” button.
Give the new tenant a name and a description. Then enter a URL name. This name will be appended to this string: https://[vraappliance.domain.name]/vcac/org/ and will be the URL that users will login to. In my example the url is https://vra7.hollow.local/vcac/org/labtenant. Click “Submit and Next”.
Enter a local user account. I used the vraadmin account much like I did in the previous post about setting up authentication. Click Next.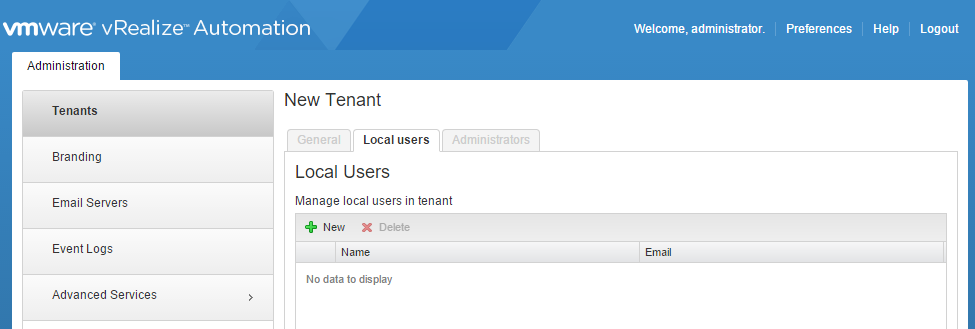
In the administrators tab, I added the vraadmin account as both a tenant administrator and an IaaS Administrator. I will admit, I’m omitting some information here. After I added the vraadmin account, I logged into the tenant as this account. I setup directory services for this account the same way I did for the default tenant. Once this was done, I added the “Domain Admins” group as a Tenant Administrator and IaaS Administrator. This end result is seen in the screenshot below.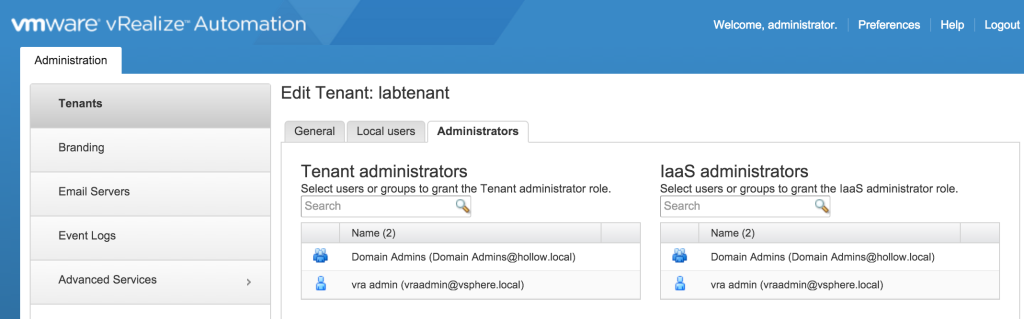
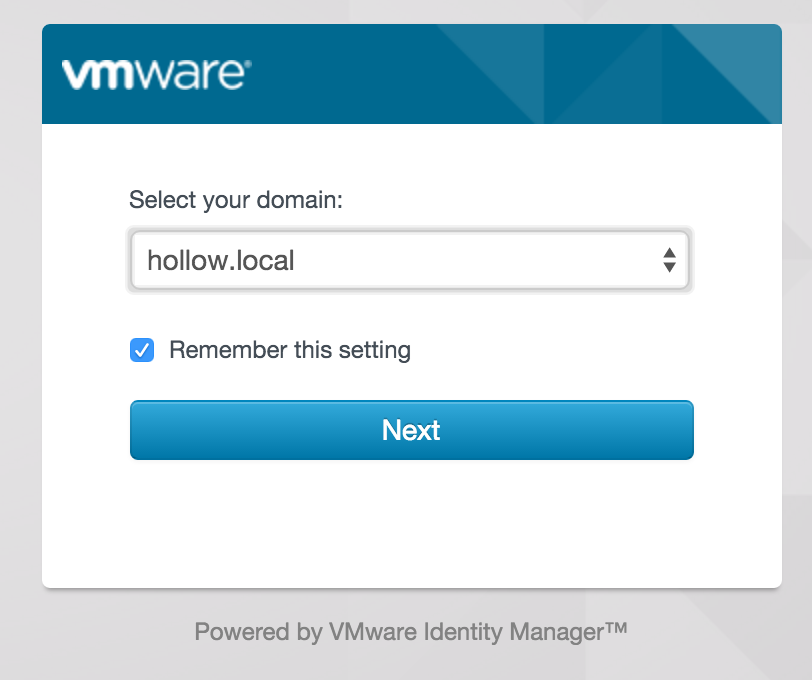
Thats it for setting up a new tenant. I did want to mention that in vRA7, when you login to a tenant with a directory configured, you’ll have the option to login to either the directory you setup or the default tenant domain. Be sure to select the right domain before trying to login.
Give the new tenant a name and a description. Then enter a URL name. This name will be appended to this string: https://[vraappliance.domain.name]/vcac/org/ and will be the URL that users will login to. In my example the url is https://vra7.hollow.local/vcac/org/labtenant. Click “Submit and Next”.
Enter a local user account. I used the vraadmin account much like I did in the previous post about setting up authentication. Click Next.
In the administrators tab, I added the vraadmin account as both a tenant administrator and an IaaS Administrator. I will admit, I’m omitting some information here. After I added the vraadmin account, I logged into the tenant as this account. I setup directory services for this account the same way I did for the default tenant. Once this was done, I added the “Domain Admins” group as a Tenant Administrator and IaaS Administrator. This end result is seen in the screenshot below.
Thats it for setting up a new tenant. I did want to mention that in vRA7, when you login to a tenant with a directory configured, you’ll have the option to login to either the directory you setup or the default tenant domain. Be sure to select the right domain before trying to login.


Comments
Post a Comment