NSX Install Guide Part 1 – Mgmt and Control Planes
Part 1 provides details of the deployment
and official documentation, we’ll build the management and control
planes by deploying NSX Manager and an NSX Controller cluster. Part 2
will walk through the data plane components; host preparation, VTEP /
VXLAN configuration, transport zone, and logical switches. Finally in Part 3 we’ll create and configure NSX Edge and Distributed Logical Routers. In order to get NSX up and running we’ll need:
NSX Install Guide Part 3 – Edge and DLR
 If you want to span virtual networks and objects (logical switches,
routers, distributed firewall rules) across multiple sites or vCenter
Server instances see the Configuring VMware Cross-vCenter NSX post.
If you want to span virtual networks and objects (logical switches,
routers, distributed firewall rules) across multiple sites or vCenter
Server instances see the Configuring VMware Cross-vCenter NSX post.
Populate the fields in the Add Controller wizard, where possible deploy each controller to a different host. For the IP Pool click Select; each NSX Controller uses an IP address from the IP Pool. If you have created IP Pools prior they will be listed here, if you need to extend an existing IP Pool see this post. Alternatively to create a new pool click New IP Pool.
To create a new IP Pool fill in the details in the Add Static IP Pool wizard. The IP Pool used can be shared with other services (i.e. doesn’t have to be dedicated to NSX Controllers) as long as there are enough free IP addresses in the pool for all 3 controllers.
When you have configured the IP Pool click Ok on the Add Controller wizard. The first controller will now be deployed.

When the deployment has completed repeat the process a further two times, using the same IP Pool. You may notice the password field is absent when deploying the second and third controllers; subsequent NSX controllers are configured with the same root password as the first deployed controller.
The NSX Controllers are ready to use. If you do have enough hosts to run the controllers on separate hosts then configure a DRS anti-affinity rule to keep them apart with the following steps:
If you have management VMs running on hosts with NSX installed, i.e. host preparation, which we’ll do next, and distributed firewall enabled; then we need to exclude those virtual machines. By default the NSX Manager, NSX Controllers, and NSX Edge virtual machines are automatically excluded from the NSX distributed firewall.
The virtual machines are now excluded from distributed firewall protection. It’s also worth noting that if a new vNIC is added to any of the VMs after adding them to the exlusions list, then the distributed firewall is still automatically deployed to that new vNIC. In this case you need to either power cycle the virtual machine, or remove and re-add it to the exclusion list.
- An underlying network with IP connectivity and an MTU size of 1600 or above.
- FQDN resolution, connectivity, and time synchronisation between NSX and vSphere components – a full list of network port requirements can be viewed in this KB.
- ESXi and vCenter versions 5.5 – 6.0 U2 for NSX 6.2.x. Update – NSX 6.3.0 is compatible with vSphere 6.5a, download NSX 6.3 here, NSX 6.3 release notes here, NSX 6.3 what’s new here.
- An FTP/SFTP server is required for NSX backups; VMware NSX Backup and Restore.
- It’s also good practise to have a syslog server configured, if you have a valid NSX license you can use Log Insight at no extra cost; Log Insight 4.0 Install Guide, NSX with Log Insight Integration.
- For monitoring and troubleshooting the NSX installation you may want to look at vRealize Network Insight.
- Hosts will need to be connected to vSphere distributed switches.
- A minimum of 3 ESXi hosts in a vSphere cluster… however the recommendation is 2 separate clusters; one for management (min 3 hosts) and one for compute. For a lab environment you can get away with less.
- The vSphere infrastructure needs to be provisioned before we begin. Installing ESXi and vCenter Server is not included in the scope of this article, however the following posts may be of use:
NSX can run on any edition of vSphere
from v5.5 Update 3 onwards. For versions 5.5 Update 1 and 2 Enterprise
Plus licensing is required. NSX comes in Standard, Advanced, and
Enterprise editions, the feature differences between editions can be
found on the product page here.
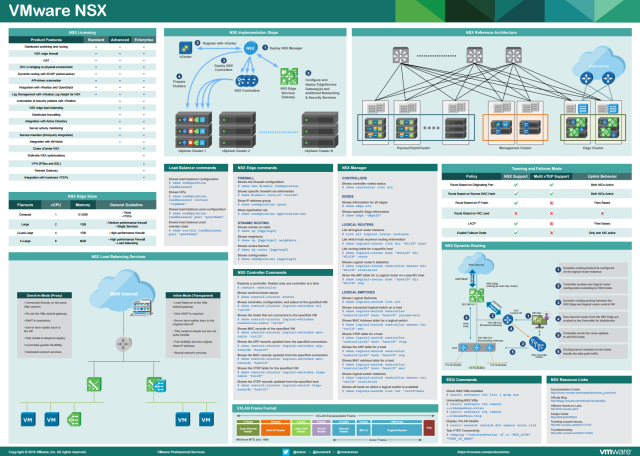
There is a great hardware calculator available on virten.net here, useful for calculating the resource requirements of your design. You can also view NSX version history on the same site, here. NSX reference poster (below) available here.Installation
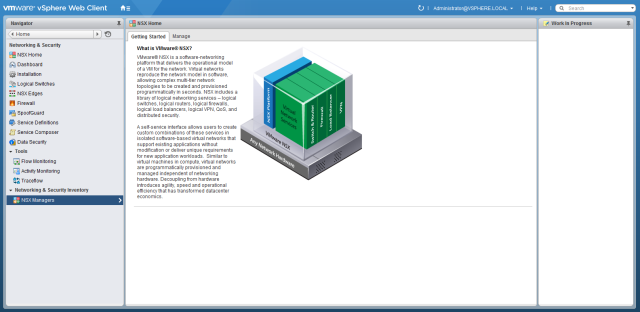
The focus of these guides will be on the
deployment and configuration of the components which make up the NSX
installation. The NSX model can be broken down into the following
sections:
- Management Plane: provides the UI and REST API interfaces. Consists of the NSX Manager and vCenter Server, as well as a message bus agent to carry communication between other planes in the model.
- Control Plane: runs in the the NSX Controller cluster which manages the run-time state of logical networks. Does not carry data traffic but connects to the management and data planes using the user world agent.
NSX Install Guide Part 3 – Edge and DLR
- Data Plane: contains the NSX vSwitch and NSX Edge. The NSX vSwitch is made up of the distributed switch and kernel modules running in the hypervisor enabling VXLAN bridging capabilities and distributed services. The NSX Edge acts as gateway device providing L2 bridging from VXLAN to the physical network, as well as other services such as perimeter firewall, load-balancing, VPN, and so on.
- After NSX is installed you may want to use Guest Introspection to offload AV scanning to a dedicated Service Virtual Machine (SVM) provided by a third party. For more information on Guest Introspection and service deployments see the NSX Manager Guest Introspection post.
There are a number of supported
topologies for the vSphere environment, review the resources listed
below for more details. In this example a vCenter Server Appliance has
been deployed with 2 vSphere clusters; the management cluster is made up
of 3 hosts and will be hosting the vCenter Server, NSX Manager, NSX
Controllers, and NSX Edge gateways. The compute cluster is made up of 4
hosts running virtual machine workloads. Distributed switches (vDS) are
configured, with the usual redundancies, 1 for management and vMotion
traffic (different VMkernel ports), 1 for VXLAN, and 1 for NSX Edges to
connect out to external networks.
You’ll also need an IP addressing scheme
in place, IP Pools are required for the deployment of NSX Controllers
(minimum 3 recommended) and VTEP interfaces (1 per host, can also be
DHCP). The setup wizards allow you to create an IP Pool at the time of
deployment, however if you need to extend an existing IP Pool, or want
to create your IP Pools in advance, see this post.
Resources
All links referenced below are official VMware resources:
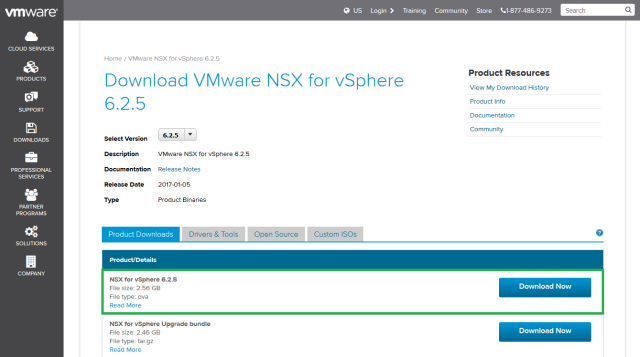
- NSX 6.2.5 download link (NSX 6.3.0 download link)
- NSX 6.2.5 release notes link (NSX 6.3.0 release notes link)
- NSX 6.2 documentation centre link (NSX 6.3 documentation centre link)
- NSX Hands on Labs link
- NSX technical white paper link
- NSX product walkthrough link
- NSX design guide link
- NSX validated designs link
- NSX icons are available here for designing your own solution.
Installing NSX Manager
NSX Manager is deployed and registered
with vCenter Server on a 1:1 mapping. Upon registration a plug-in is
injected into the vSphere web client to enable deployment and management
of logical networks and services.
Before beginning add a DNS entry for the NSX Manager in the relevant zone. Download the NSX Manager OVA file here.
The NSX Manager appliance is preconfigured with 16 GB RAM, 4 vCPU and
60 GB disk. VMware recommend a memory reservation for NSX Manager in
production environments.
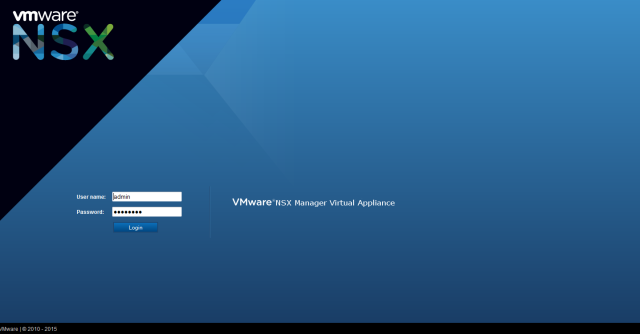
Deploy the OVA file to the vCenter, in
the customisation options configure the appliance network settings. Once
the NSX Manager appliance is deployed and powered on open a web browser
to the configured IP address. Log in with the admin account, if you didn’t change the password during deployment the default password is default.
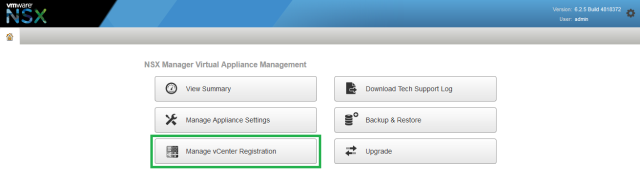
Click Manage vCenter Registration, under vCenter Server click Edit. Enter the name of the vCenter server to register NSX Manager and the relevant credentials, click Ok. Configure the vCenter settings under Lookup Service URL by clicking Edit, enter the vCenter host name and SSO details, click Ok.
Note the Backup & Restore
option, this method uses FTP / SFTP and is currently the only supported
way of backing up and restoring NSX Manager, for more information see VMware NSX Backup and Restore. Browse to the Manage Appliance Settings page, configure a time server and check DNS and host name settings are correct. You can also configure a syslog server, such as vRealize Log Insight, and change network settings if required.
After configuring NSX Manager restart the
VMware vSphere Web Client on the vCenter Server the NSX Manager was
registered with. You may also need to restart your browser. Log in to
the vSphere web client and browse to Networking & Security, click NSX Managers and verify the newly deployed NSX Manager is present.
To configure additional permissions select the NSX Manager and click Manage, Users.
Here you can add, edit, and remove users and permissions. Each role
provides a description of the level of access, for more information on
NSX permissions click here. To add Active Directory permissions to NSX Manager select the Domains tab, and click the green plus symbol to add the LDAP details.
To apply a license key to NSX Manager select the Administration option from the home page of the vSphere web client, click Licenses, Assets, Solutions. Highlight NSX for vSphere and click the All Actions drop down menu, select Assign License. Add a new license key or assign an existing license key and click Ok.
Installing NSX Controllers
- The NSX Controller cluster is made up of 3 NSX Controllers for high availability, ideally these should be deployed to 3 different hosts in a management cluster, and 3 different datastores, to provide redundancy.
- The NSX Controller cluster provides the control plane and is responsible for maintaining information of logical switches and distributed logical routers, as well as hosts and virtual machines.
- NSX Controllers are deployed as Linux based virtual machines with 2 vCPU, 4 GB RAM, and 20 GB disk.
- NSX Controllers require an IP address from a defined IP Pool, preferably on the same subnet as the ESXi management addresses.
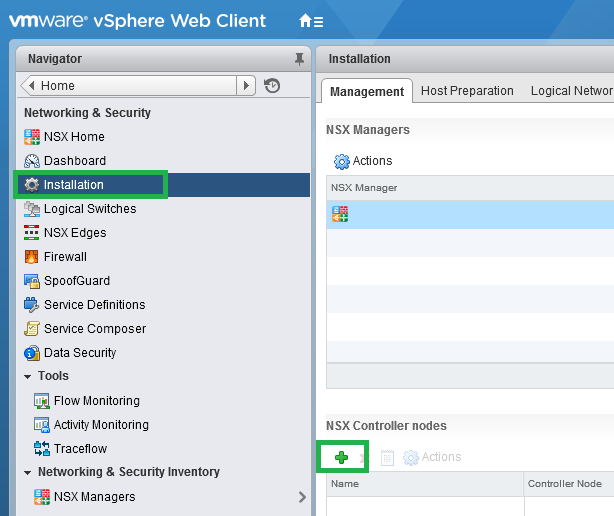
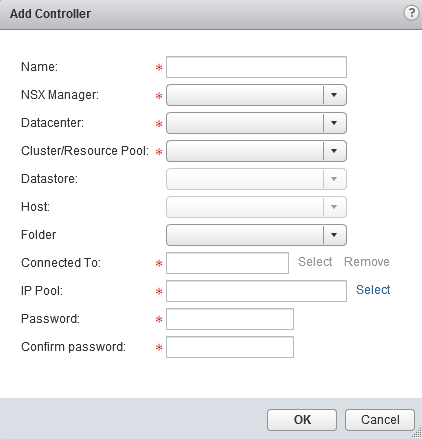
Populate the fields in the Add Controller wizard, where possible deploy each controller to a different host. For the IP Pool click Select; each NSX Controller uses an IP address from the IP Pool. If you have created IP Pools prior they will be listed here, if you need to extend an existing IP Pool see this post. Alternatively to create a new pool click New IP Pool.
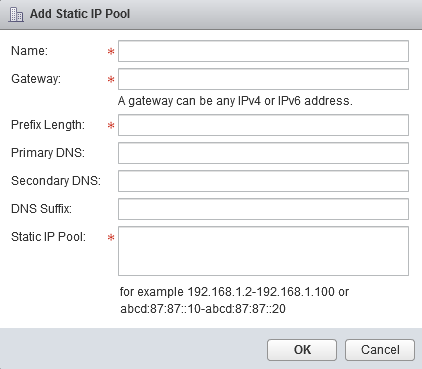
To create a new IP Pool fill in the details in the Add Static IP Pool wizard. The IP Pool used can be shared with other services (i.e. doesn’t have to be dedicated to NSX Controllers) as long as there are enough free IP addresses in the pool for all 3 controllers.
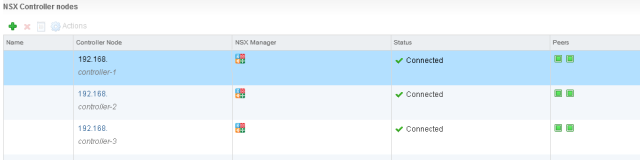
When you have configured the IP Pool click Ok on the Add Controller wizard. The first controller will now be deployed.
When the deployment has completed repeat the process a further two times, using the same IP Pool. You may notice the password field is absent when deploying the second and third controllers; subsequent NSX controllers are configured with the same root password as the first deployed controller.
The NSX Controllers are ready to use. If you do have enough hosts to run the controllers on separate hosts then configure a DRS anti-affinity rule to keep them apart with the following steps:
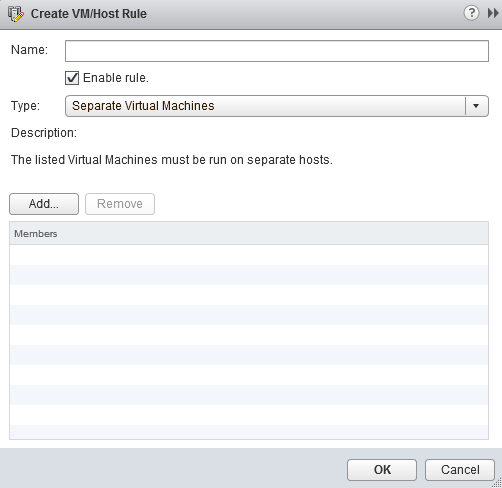
- In the vSphere web client click on the cluster where the NSX Controllers reside.
- Open the Manage tab and select VM/Host Rules under Configuration.
- Click Add to create a new rule.
- Choose to Separate Virtual Machines and add the NSX Controllers, click Ok.
Firewall Exclusions
VMware recommend that any management virtual machines are excluded from the NSX distributed firewall. Likely candidates are the vCenter Server, vCenter database (if external), Platform Services Controller (if external), etc. If you have a separate management cluster and are not preparing the management hosts for NSX then you do not need to worry about this step.If you have management VMs running on hosts with NSX installed, i.e. host preparation, which we’ll do next, and distributed firewall enabled; then we need to exclude those virtual machines. By default the NSX Manager, NSX Controllers, and NSX Edge virtual machines are automatically excluded from the NSX distributed firewall.
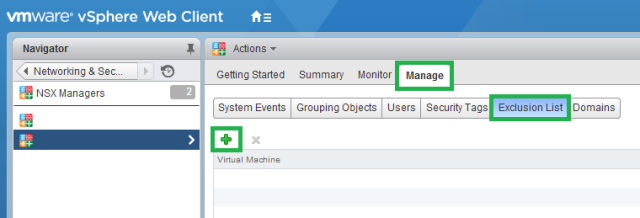
- From the vSphere web client select Networking & Security, click NSX Managers.
- Select the NSX Manager and click the Manage tab, then Exclusions List.
- Click the green plus symbol, select the virtual machines to add to the exclusions list and click Add, and Ok.
The virtual machines are now excluded from distributed firewall protection. It’s also worth noting that if a new vNIC is added to any of the VMs after adding them to the exlusions list, then the distributed firewall is still automatically deployed to that new vNIC. In this case you need to either power cycle the virtual machine, or remove and re-add it to the exclusion list.


Comments
Post a Comment