Setting Up Authentication:vRealize Automation 7
In order to setup Active Directory Integrated Authentication, we must
login to our default tenant again but this time as our “Tenant
Administrator” instead of the system administrator account that is created during initial setup.
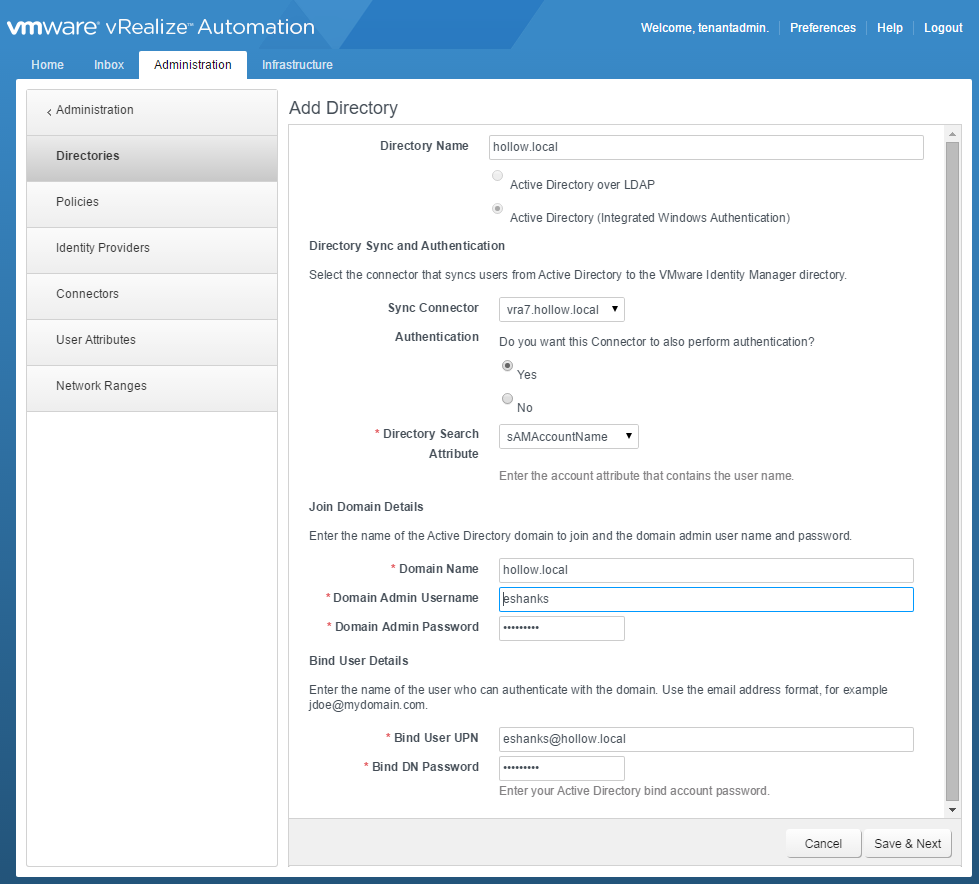
Once you’re logged in, click the Administration tab –> Directories Management –> Directories and then click the “Add Directory” button. Give the directory a descriptive name like the name of the ad domain for example. Then select the type of directory. I’ve chosen the “Active Directory (Integrated Windows Authentication)” option. This will add the vRA appliance to the AD Domain and use the computer account for authentication. Note: you must setup Active Directory in the default (vsphere.local) tenant before it can be used in the subtenants.
Next choose the name of the vRA appliance for the “Sync Connector” and select “Yes” for the Authentication. I’ve chosen sAMAccountName for the Directory Search Attribute. After this, we need to enter an account with permissions to join the vRA appliance to the Active Directory Domain. Lastly, enter a Bind UPN that has permissions to search Active Directory for user accounts. Click “Save and Next”.
Now, select the domain you just added. Click Next.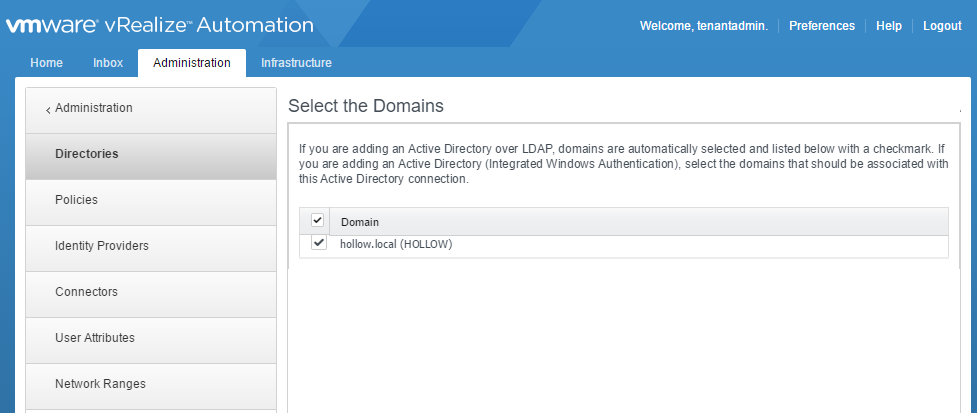
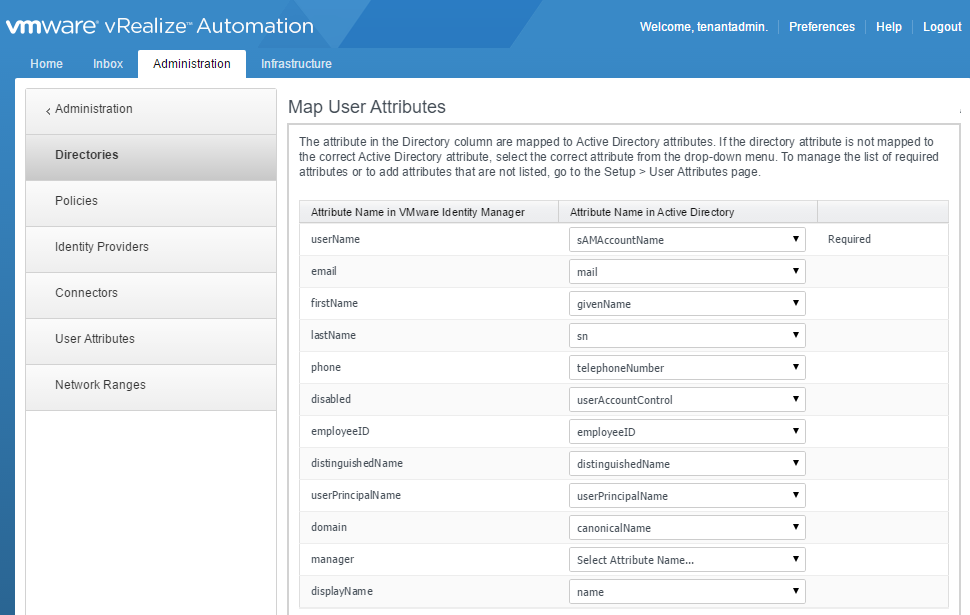
Now we can map vIDM properties to your active directory properties. The properties I used are shown in the screenshot below. I tweaked the default values a tad bit, but for the most part, all of the properties were already mapped correctly to start with.
Now we enter a Distinguished Name to search for groups to sync with. I chose the root DN for my domain, and selected all of the groups. Click Next.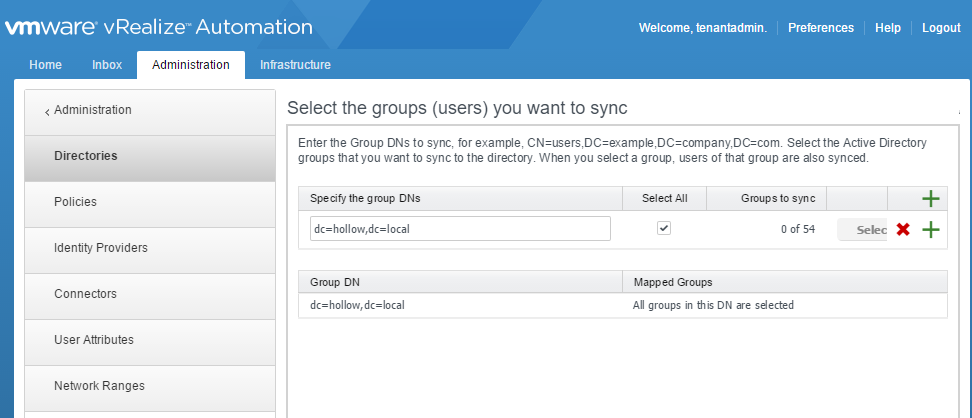
I repeated the process with user accounts. Click Next.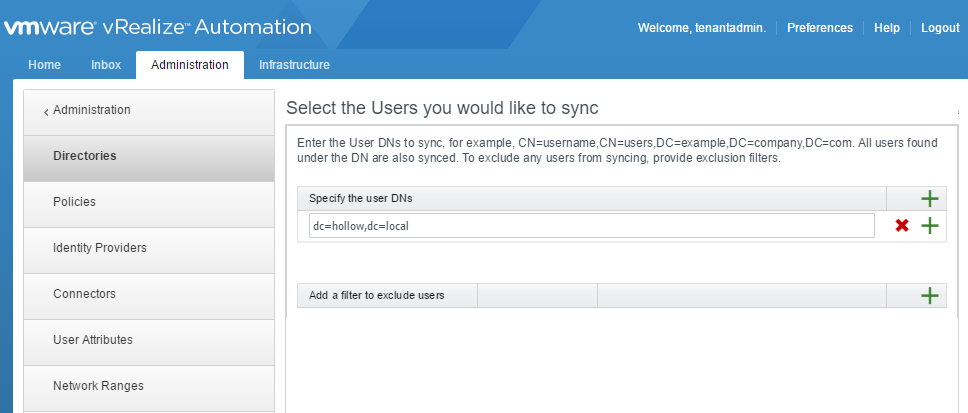
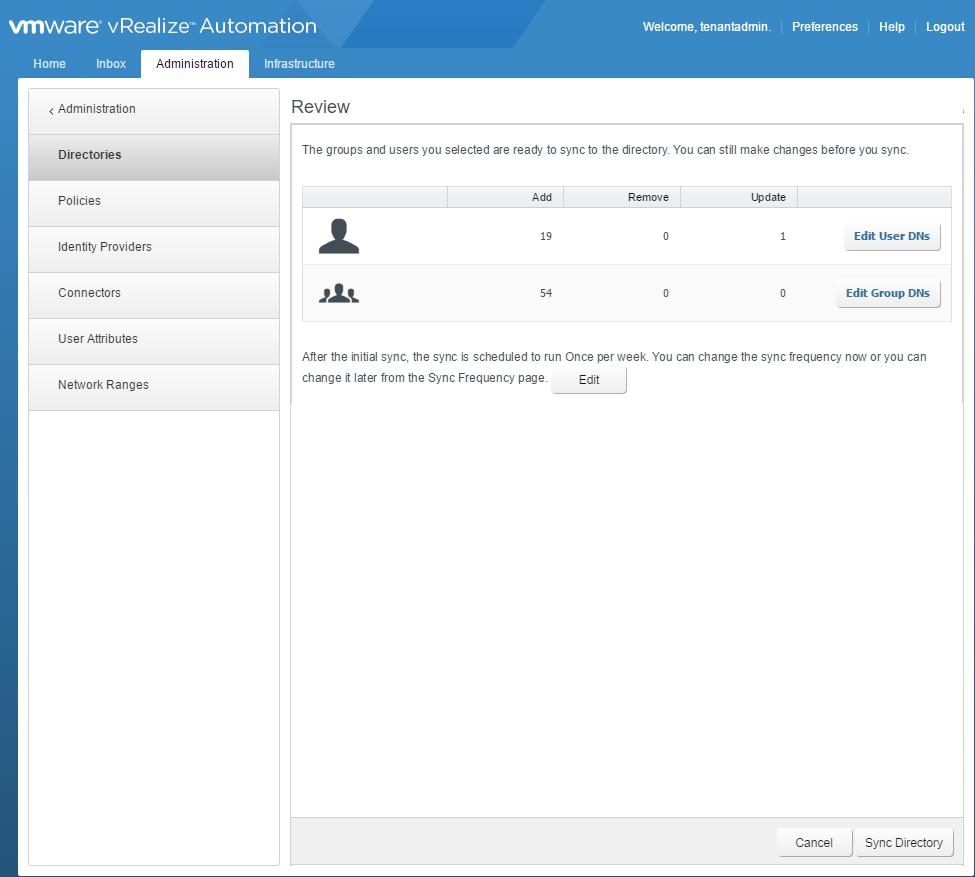
The next screen shows you details about the user and groups that will be synced. You can edit your settings or click “Sync Directory” to complete the setup.
Once you’re logged in, click the Administration tab –> Directories Management –> Directories and then click the “Add Directory” button. Give the directory a descriptive name like the name of the ad domain for example. Then select the type of directory. I’ve chosen the “Active Directory (Integrated Windows Authentication)” option. This will add the vRA appliance to the AD Domain and use the computer account for authentication. Note: you must setup Active Directory in the default (vsphere.local) tenant before it can be used in the subtenants.
Next choose the name of the vRA appliance for the “Sync Connector” and select “Yes” for the Authentication. I’ve chosen sAMAccountName for the Directory Search Attribute. After this, we need to enter an account with permissions to join the vRA appliance to the Active Directory Domain. Lastly, enter a Bind UPN that has permissions to search Active Directory for user accounts. Click “Save and Next”.

Now, select the domain you just added. Click Next.

Now we can map vIDM properties to your active directory properties. The properties I used are shown in the screenshot below. I tweaked the default values a tad bit, but for the most part, all of the properties were already mapped correctly to start with.

Now we enter a Distinguished Name to search for groups to sync with. I chose the root DN for my domain, and selected all of the groups. Click Next.

I repeated the process with user accounts. Click Next.

The next screen shows you details about the user and groups that will be synced. You can edit your settings or click “Sync Directory” to complete the setup.

Comments
Post a Comment